

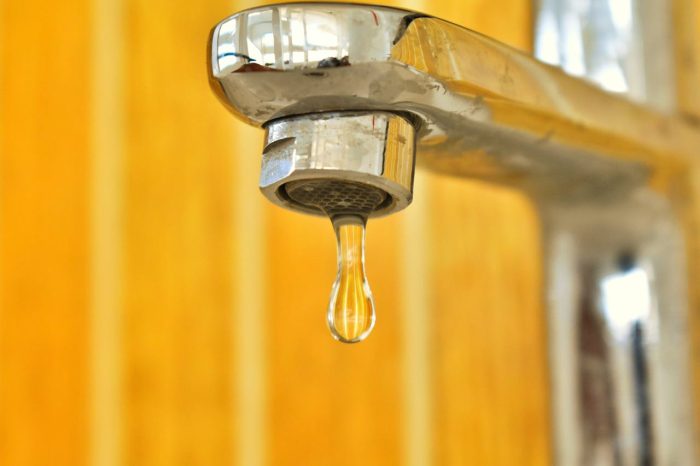
A typical issue in many homes is a leaky faucet. This can be described as a leaking faucet or simply a faucet that drips occasionally or continuously because it doesn’t completely shut off the water flow. This problem is not just a nuisance; it has the potential to cause a number of issues, including:
Identifying the Type of Faucet:
Common types of faucets
Disc Faucets
- There is only one lever, but two ceramic discs are actually part of the inner workings.
- Long-lasting and sturdy. In most cases, the lever moves with silky smoothness.
Cartridge Faucets
- The number of handles is up to you. The internal cartridge can be easily replaced after disassembling the device.
- The smooth and constant motion of the handle allows for simple control of flow and temperature.
Ball Faucets
- There is typically a rounded, ball-shaped cap and a single handle that can be used to move it above the base.
- The handle can be turned in any direction, allowing for one-touch control of flow rate and temperature.
Compression Faucets
- To adjust the water flow, turn separate levers for the cold and hot water.
- Turning the handles causes you to sense compression. Many older houses have characteristics.
Common Causes of a Leaky Faucet
Damaged Seals
Leaks in faucets can occur due to wear and tear on the many seals used in the fixtures.
O-Ring Issues
A little rubber ring called an O-ring forms a seal when it is fitted around the valve stem. Leaks can occur if it is worn down or destroyed over time.
Water Pressure is High
When the water pressure is too high, it might cause a faucet to leak, particularly in vulnerable areas.
Corroded Valve Seat
A valve seat is what really attaches the spout to the faucet. The valve seat is susceptible to corrosion, which might lead to a leak near the spout.
Worn-Out Cartridge
Leaks in cartridge faucets can develop as the cartridge wears out over time.
Improper Installation
The components of the faucet can cause leaks if they are not installed properly.
Worn-Out Washer
Old washers are the most common culprit when it comes to a leaking faucet. The valve seat presses down on the washer, and the friction between the two can wear it down over time.
Broken or Loose Parts
There are instances where the leak is the result of a broken or loose component within the faucet, such as a broken stem or a packing nut that has come free.
It is possible to avoid most faucet leaks with regular maintenance and prompt replacement of old parts.
Materials and tools you’ll need:
- The screwdriver should be either Phillips or flat-head, depending on the type of faucet you have.
- Plumber’s grease
- Plumber’s tape
- Cloth or Rag
- Replacement parts such as a new cartridge, washers, or O-rings are required.
- Adjustable wrench
Step-by-Step Guide for Fixing a Compression Faucet:
Turn off the water supply.
- Under the sink, you should see two shut-off valves; turn them clockwise to turn off the water.
- Cut off the water supply to the entire house if you can’t find any shut-off valves beneath the sink.
Open the faucet.
- Drain the pipes of any excess water by turning on the faucet.
Remove the faucet handle.
- To remove the decorative cap from the faucet handle, use a flat-head screwdriver.
- Take a Phillips screwdriver and unscrew the screw that’s keeping the handle on.
- Remove the faucet handle.
Remove the valve stem.
- Using an adjustable wrench, loosen and remove the packing nut, also known as a bonnet nut. Assemble the valve stem.
- When the packing nut is removed, you should be able to remove the valve stem. To remove it from an obstruction, try gently wriggling it or using pliers.
Inspect the valve stem.
- Look for wear or damage on the valve stem. The washer at the stem’s base is a common leak source, so be sure to inspect it thoroughly.
Replace the washer.
- Remove the screw from the valve stem’s base that secures the washer.
- New washers should match the old ones in size and type.
- Use the screw to fasten the new washer.
Lubricate the valve stem.
- For trouble-free operation, coat the threads of the valve stem with a tiny bit of plumber’s grease.
Reassemble the faucet.
- Put the valve stem back into the faucet’s housing.
- The packing nut should be tightened with an adjustable wrench.
- Remember to screw the handle back onto the valve stem one more time.
- If there was a decorative cap, reattach it.
Turn on the water supply.
- To turn on the water again, turn the valves under the sink counterclockwise.
- Reconnect the main water line if you have already done so.
Test the faucet.
- Run water through the faucet to locate any leaks.
- Turn off the faucet and make sure it runs smoothly without dripping.
How to repair a ball faucet.
Steps to Fix a Ball Faucet:
Turn off the water supply.
- Under the sink, you should see the shut-off valves.
- To turn off the water supply, turn the valves clockwise.
- To remove any excess water, open the faucet.
Remove the faucet handle.
- To remove the set screw from the handle, use an Allen wrench.
- Remove the faucet handle.
Disassemble the faucet.
- To remove the faucet’s collar, use an adjustable wrench.
- With care, remove the cap and any washers that may be underneath it.
- To remove the ball assembly, simply pull it up straight.
Inspect and replace parts.
- If the ball appears worn, replace it.
- Take a look at the faucet’s body, including the springs and seats. They are typically responsible for leaks.
- Get out your needle-nose pliers and take out the old springs and seats.
- Use the replacement kit to install new seats and springs.
Clean the faucet components.
- Rinse the extracted components in vinegar to remove any trace minerals.
- Use a towel or rag to wipe down the faucet’s interior.
Reassemble the faucet.
- The new O-rings should be lubricated with plumber’s grease.
- Attach the replacement O-rings to the faucet’s body.
- Place the replacement springs and seats in the faucet’s body.
- Carefully align the ball assembly before replacing it with the faucet body.
Reinstall the handle and cap.
- Return the cap to the faucet body by screwing it on with an adjustable wrench.
- If you over-tighten the components, they are vulnerable to harm.
- Put the handle back on and use the Allen wrench to tighten the set screw.
Turn on the water supply and test.
- To turn on the water again, turn the shutoff valves counterclockwise.
- When you open the faucet, make sure there are no leaks.
- Make sure the water is flowing freely and the handle is turning smoothly.
How to Fix a Cartridge Faucet
Steps
Turn off the water supply.
- Turn the shut-off valves clockwise to close them; you’ll find them under the sink.
- To release any residual pressure and confirm that the water is turned off, turn on the faucet.
Remove handle
- Take out the screw that holds the handle in place using a screwdriver or an Allen wrench.
- The cartridge can be accessed by raising the handle.
Remove the retention clip or nut
- To release the cartridge from its retaining clip or nut, use a channel-lock plier or an adjustable wrench.
Remove cartridge
- Remove the cartridge from the faucet body with care. To get a sturdy hold, you might need to use pliers.
- When replacing the cartridge, be sure to keep the cartridge’s orientation in mind.
Inspect and clean
- Use a rag or towel to wipe down the interior of the faucet body if you see any dirt or mineral deposits.
Install a new cartridge
- The O-rings on the replacement cartridge should be greased with plumber’s grease.
- Carefully place the replacement cartridge into the body of the faucet, ensuring it is lined up correctly.
Reassemble faucet
- After replacing the retaining clip or nut, tighten it securely.
- Put the screw back in place and reattach the handle.
Turn on the water supply
- In order to open the shut-off valves, turn them counterclockwise.
- To make sure the faucet is working properly and to check for leaks, turn it on.
How to Fix a Ceramic Disk Faucet:
Steps:
Turn off the water supply.
- You may find the valves that switch off the water supply under the sink; turn them off. Open the faucet to relieve any excess water pressure.
Remove the faucet handle.
- Remove the handle by unscrewing the screw that holds it in place. You can use a flat-head screwdriver to remove the decorative cap that may be covering the screw.
Remove the cartridge.
- With an adjustable wrench, loosen the nut that secures the cartridge. With caution, remove the cartridge.
Examine the cartridge.
- Make sure there are no damages or cracks in the ceramic disks. If the cartridge is damaged, changing it is necessary.
Clean the parts.
- To remove mineral deposits, soak the cartridge and other components in vinegar. To clean the faucet body and any other parts, use a cloth.
Replace worn parts.
- Use new seals or O-rings if the old ones are damaged or worn out. Before installing the new O-rings, lubricate them with plumber’s grease.
Reassembling the faucet.
- Return the cartridge to its original position within the faucet’s body. To secure the retaining nut, tighten it to a snug fit without over-tightening it.
Reattach the handle.
- After removing it, screw the handle back onto the stem. If there was a decorative cap, replace it.
Turn on the water supply.
- After removing it, screw the handle back onto the stem. If there was a decorative cap, replace it.
Preventive Maintenance Tips:
Regular Maintenance
- Be careful not to overtighten the connections under the sink and around the tap. This is due to the possibility of damaging the seals and washers.
- On a regular basis, unscrew the tap aerator and clean it to avoid silt buildup, which can lead to leaks.
- To avoid leaks due to sediment buildup, unscrew the faucet aerator and clean it occasionally.
Preventive Measures
- In areas with high water pressure, faucet components could wear out more quickly. Using a pressure gauge, make sure the water pressure in your house is within a safe range—typically 40 to 60 psi.
- Avoid leaks due to wear and tear by greasing moving parts with plumber’s grease.
- A lot of leaks happen because of worn-out O-rings and washers. You should change them out from time to time, especially if you notice any leaks.
Additional Tips
- To prevent leaks and seal damage, be careful not to over-tighten the nuts and screws when putting the faucet back together.
- Consult a professional plumber to minimize more damage if you’re unsure about any part of the repair process.
- If you want your replacement components to last and work properly, you should only use high-quality ones.
Conclusion
Saving water, avoiding damage, and cutting expenses are all possible outcomes of quickly fixing a leaky faucet. Your plumbing fixtures will last longer if you maintain them regularly and fix any problems quickly.