

While dealing with plumbing issues is never fun, you might be surprised by how simple it is to fix many common problems on your own. DIY plumbing repairs can help you save money and feel good about yourself. Having a rudimentary understanding of plumbing might give you the ability to fix common plumbing issues like a running toilet, a clogged drain, or a leaking faucet without calling a professional.
Here are some DIY plumbing fixes for beginners:.
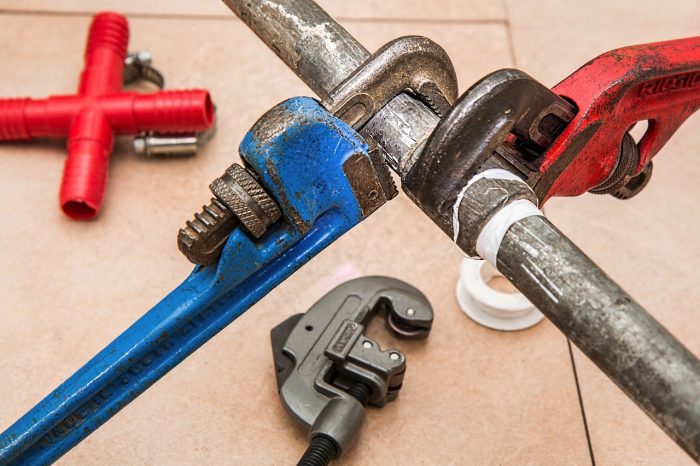
Unclog the sink drain.
Using a plunger
What You’ll Need:
- Plunger
- Bucket (optional)
- Rags or Towels
Instructions:
- If there is any water collecting in the sink, empty it. The water can be collected using rags or a bucket.
- If you have double-basin sinks, you can conceal one of the drains with a moist cloth. This can create a vacuum.
- Place the plunger over the drain to cover the entire hole.
- Pour water into the basin until it reaches the plunger’s edge. As a result, the seal is improved.
- While maintaining the seal, quickly raise and lower the plunger. Give it a good 20 seconds.
- Check if water drains by raising the plunger. Do the plunging motion again if it doesn’t work.
- If the water drains, let hot water run for a few minutes; this will remove any remaining particles.
Use a plumber’s snake
What You’ll Need:
- Plumbing snake (auger)
- Towels or Rags
- Bucket
- Rubber gloves
Instructions:
- Preparation
- If there is any water collecting in the sink, empty it. The water can be collected using a bucket or rags.
- Protect your hands by donning a pair of rubber gloves.
- Remove the P-trap
- To catch any water that could leak, put a bucket under the sink.
- The P-trap, the U-shaped pipe under the sink, has slip nuts that you can loosen with a wrench or your hands.
- Take out the P-trap and make sure there are no obstructions. Perform any necessary cleanings.
- Insert the snake
- If the P-trap is clear, insert the plumbing snake into the drain pipe that leads into the wall.
- Turn the handle while you push the snake down the drain. As soon as you sense resistance, stop feeding the snake.
- Break up the clog
- To free the snake from the obstruction, turn it counterclockwise. Push and pull on the snake’s body to gently rotate it.
- After unclogging it, gently remove the snake while keeping the handle turned.
- Reassembling and testing:
- Put the P-trap back together and double check that everything is snug.
- To check if the blockage has been removed, run water. If the drainage is slow, it may be necessary to repeat the technique.
- Cleaning:
- Ensure that the snake and any tools utilized are thoroughly cleaned.
- Throw away the bucket and any debris it may have contained.
Tips and precautions
- If none of these solutions work, you might want to consider contacting a licensed plumber.
- To clear very difficult blockages, it may be necessary to use a plumbing snake in conjunction with plunging.
- Be very careful not to break pipes while dealing with plumbing.
You should be able to successfully remove most sink drain clogs by following these procedures.
Identifying and replacing a leaking faucet
Before you can replace a leaking faucet, there are a few steps to finding the leak’s source and correcting it. For your convenience, we have included the following detailed instructions:
Identifying the leak’s source
- While you might not be able to see a leak, you could be able to detect the sound of water dripping. This can make finding the leak’s source easier.
- Pooling water under the sink may indicate a leak in supply lines or faucet connections. Look out for this.
- The washer or valve seat inside the faucet is probably at fault if water continues to drip from the spout even after turning it off.
- A faulty stem or seal on the handle may cause water to drip when the tap is turned on.
Tools and materials are needed.
- Buckets or towels to catch water
- Plumber’s tape (optional)
- Depending on the type of screw, use a Philips or flathead screwdriver.
- Penetrating oil (optional if screws are difficult to remove)
- Basin wrench or adjustable wrench
- Replacement parts (cartridges, O-rings, washers, etc.)
Steps to Replace a Leaking Faucet
For compression faucets
Older homes often have compression faucets, which have two handles: one for cold water and one for hot water.
- Turn off the water supply
- Turn off the water supply by finding the shut-off valves under the sink and turning them clockwise.
- Cut off the main water supply to your home if there are no shut-off valves.
- Drain the faucet
- Open the faucet to turn off the water supply to the pipes.
- Remove the faucet handle
- Find the screw that fastens the handle and remove it with a screwdriver. On top of the handle may be a decorative cap with a screw. In that case, you’ll need a flathead screwdriver to free the cap.
- After removing the screw, you can remove the handle.
- Remove the valve stem
- Loosen the packing nut that secures the valve stem using an adjustable wrench.
- The valve stem must be removed with precaution. You may have to unscrew it a little more to get it completely off.
- Locate the washer and O-ring, then replace them
- The washer is set at the base of the valve stem. It is typically secured with a screw.
- Unscrew the screw and remove the old washer.
- Swap out the worn-out O-ring and washer for brand new ones.
- Reassemble the faucet
- Put the valve stem back into the faucet’s housing.
- Use the wrench to tighten the packing nut.
- Screw the faucet handle back onto the fixture.
- Turn on the water supply
- To open the shut-off valves located under the sink, turn them counterclockwise.
- To make sure the faucet is working properly and to check for leaks, turn it on.
For Disk, Ball, and Cartridge Faucets
The interior mechanisms of these faucets are different and more modern. While the steps are comparable, other components (such as disks, balls, or cartridges) may be necessary.
- Turn off the water supply
- Turn off the water supply and drain the faucet, following the same steps as with compression faucets.
- Remove the faucet handle
- Remove the faucet handle by unscrewing the screw holding it in place with a screwdriver.
- Discard the cartridge, ball, or disk
- For access to the faucet’s inner workings, remove the collar or cap.
- Using pliers or an adjustable wrench, remove the disk, ball, or cartridge.
- Inspect and replace the parts
- Take a look inside to see if anything seems worn. Put new parts in place of old ones if they are worn out or damaged.
- Disk faucets need to replace their ceramic disks.
- Change the packing, cam, and ball on ball faucets.
- Change the whole cartridge in a cartridge faucet.
- Reassemble the faucet
- Start by disassembling the faucet. Then, in reverse order, put it back together.
- Verify that everything is fastened firmly.
- Turn on the water supply
- To open the shut-off valves located under the sink, turn them counterclockwise.
- To make sure the faucet is working properly and to check for leaks, turn it on.
Following these procedures should allow you to locate and repair the majority of faucet leaks.
Sealing leaky pipe joints
One frequent and effective way is to use plumber’s tape, which is also called Teflon tape, to identify and fix leaking pipe joints. For your convenience, here’s a detailed procedure:
Pinpointing Leaky Pipe Joints
- Keep an eye out for telltale indications of water seepage at pipe junctions.
- Look for signs of mold, dampness, or water stains close to the joints.
- Check for dampness by running your fingers along the pipe seams.
- Find a peaceful area and listen for the trickle of water; this could be a sign of a leak.
- After a few minutes, use a dry cloth to wipe the joints; then, look for any signs of moisture.
- Locate the water meter and disconnect any fixtures that use water. If it keeps moving, you could be dealing with a leak.
Using Plumber’s Tape to Repair Leaky Pipe Joints
Turn off the water supply
- Turn off the water supply to the damaged pipe before beginning the repair process.
Disconnecting the joint
- Gently loosen the leaking joint using a wrench. Take care not to scratch the pipes.
Clean the threads
- Give the pipe and fittings a good cleaning. Get rid of any corrosion, old plumber’s tape, or debris.
Apply plumber’s tape
- Place the plumber’s tape end on the pipe’s initial thread.
- Go around the threads with the tape in the same direction they are going (often clockwise).
- To get thorough coverage, slightly overlap the tape as you wrap it.
- To get thorough coverage, slightly overlap the tape as you wrap it.
Reconnect the joint
- Screw the joint back together with care, making sure it’s tight but not too tight to cause harm.
- Be careful not to use too much force when doing the last wrench round.
Turn On the water supply
- Check for leaks as you gradually re-establish the water supply.
- If the leak still doesn’t go away after double-checking the tape and joint, try again.
If you follow these procedures, you should be able to use plumber’s tape to fix any leaking pipe joints and have a plumbing system that is secure and leak-free.

Fixing a Running Toilet
Using plumber’s tape—also called thread seal tape or Teflon tape—to locate and fix leaking pipe joints is an easy way to save time and avoid water damage. This is how it is done:
Identifying leaky pipe joints
- Listen for dripping sounds
- Find a peaceful area and listen for the trickle of water; this could be a sign of a leak.
- Use a dry cloth or tissue
- Use a dry towel or cloth to clean the joint. When it gets wet, it means there’s a leak.
- Feel for moisture
- Run your fingertips along the pipe joints to ensure that they are dry.
- Visual checkup
- It’s a good idea to look for mold or mildew as a sign of ongoing dampness.
- Corrosion, wet spots, or water droplets are all telltale indications of a water leak near a pipe joint.
Using plumber’s tape to fix leaky pipe joints
- Turn off the water supply
- To stop water from flowing while you work, turn off the water valve to the pipe portion you’ll be repairing.
- Drain the pipes
- When no more water is visible in the pipe, open the faucets that lead to it.
- Disassemble the joint
- Use pliers or a tool to gently remove the screw that is causing the joint to leak. Make a mental note of the pipe connections.
- Clean the threads
- Remove any corrosion, debris, or old tape from the threads of the male and female pipe ends. If required, use a wire brush.
- 5. Apply plumber’s tape
- First, find the pipe’s male threads and wrap a roll of plumber’s tape over them.
- Work your way around the pipe, beginning at one end, following the threads (usually in a clockwise orientation).
- To get consistent coverage, wrap the tape with an overlap of around 50%. Typically, you just need three to five layers of tape.
- To ensure that the tape seals tightly, press it into the threads while wrapping.
- Reassemble the joint
- Reassemble the joint by manually screwing it back together, and then tighten it securely with a wrench. Overtightening could ruin the threads, so be careful.
- Turn on the water supply
Check for leaks as you gradually re-establish the water supply. When there is no leakage, the repair is considered complete.
Here are some tips for using plumber’s tape effectively.
Avoid overuse
If there is too much tape, screwing the joint together may be impossible.
Wrap the tape properly
Wrap the tape so it encircles the threads in the same direction. While screwing the joint together, the tape is kept from coming undone.
Use the right tape
Pick out the tape that’s perfect for what you’re doing. Most home plumbing can be sealed with regular white Teflon tape, but bigger pipes or systems with high pressure require thicker pink tape.
In order to fix leaking pipe joints with plumber’s tape and make sure the connection is tight and leak-free, follow these procedures.
Conclusion
You can easily and efficiently address many common household problems by mastering the basics of DIY plumbing repairs. You can become a competent plumber for your own house with enough time and effort put into practicing.