Express Drainage Solutions

A Solution for Sanitation, Wastewater Treatment & Renewable Energy

Njengi House

2nd Floor Suite 6, Tom Mboya St.

8:00AM - 5:00PM

Monday to Friday

+254742781455

info@expresswatersolutions.com

Category

Drainage Systems

Which is Better French Drain or Channel Drain?

Which is Better French Drain or Channel Drain?

By | Drainage Systems | No Comments

When deciding between a French drain and a channel drain, several aspects need consideration. These include the preferred aesthetics, the area you want to deal with, and the issue you want to solve. To make an informed decision, let’s compare and contrast the two and look at common-use scenarios for both.

Helpful information to help you decide between a French drain and a channel drain

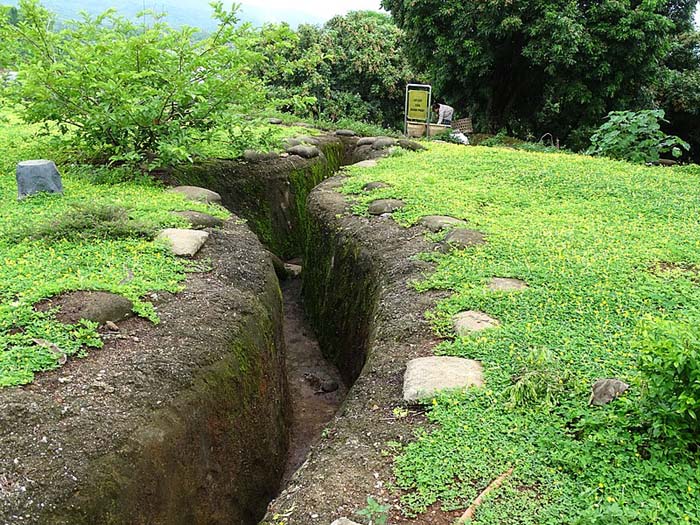
The advantages of channel drains

  • Visually appealing

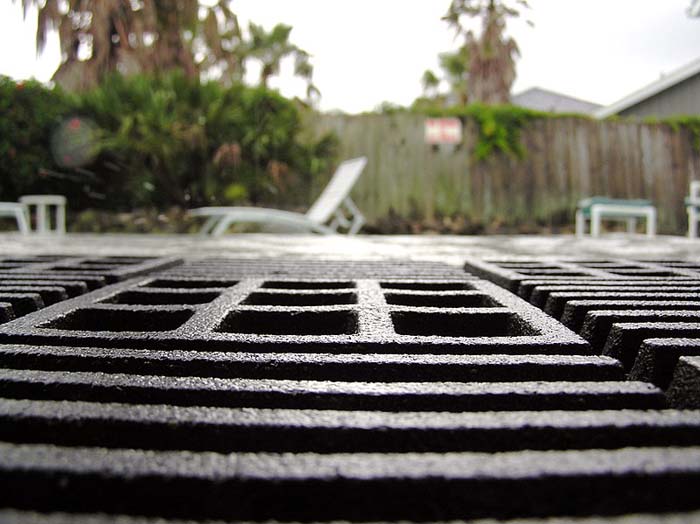
Grates that blend in with their natural surroundings can seamlessly incorporate channel drains into landscape designs. Residential properties, public places, and gardens highly value their visual appeal.

Regarding surface water management, channel drains—linear drains or trench drains—are a popular choice in many different environments, from homes to factories. The main benefits of channel drainage are as follows:

  • Compliance with regulations

Regulations in many areas mandate proper drainage for building projects. Channel drains are a great way to comply with your area’s environmental and construction codes.

  • Reduced flood risk

Utilizing channel drains to collect and redirect water properly can reduce the risk of flooding. This becomes paramount, particularly in regions that experience frequent flash floods or high rains.

  • Low maintenance

Once installed, channel drains need very little maintenance. Most of the time, you only need to clean the grates regularly and periodically empty the channel of debris to keep them in good working order.

  • Many possible uses 

Channel drains have practically endless applications. They are ideal for industrial plants, pool decks, sidewalks, driveways, sports fields, patios, and parking lots.

  • Improved safety

Channel drains help prevent slips and falls by decreasing standing water on surfaces. This is of utmost importance in locations that experience heavy vehicular or pedestrian traffic.

  • Durability and longevity

Long-lasting materials used to make high-quality channel drains include composites based on polymers, stainless steel, or concrete. This guarantees that they will endure harsh environments, chemicals, and large weights for an extended period of time.

  • Customizable design

Channel drains come in a wide range of styles, materials, and sizes, allowing customization to meet individual requirements. You can customize them to manage varying flow rates, and they come in various grating designs to match aesthetic tastes.

  • Benefits to the Environment

Stormwater runoff management systems can incorporate channel drains to mitigate the environmental impact. They may also recommend environmentally friendly drainage options such as filtration systems or retention ponds.

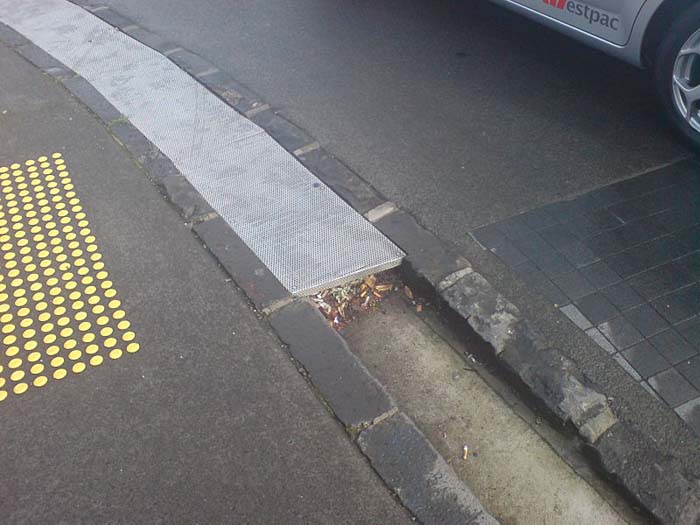
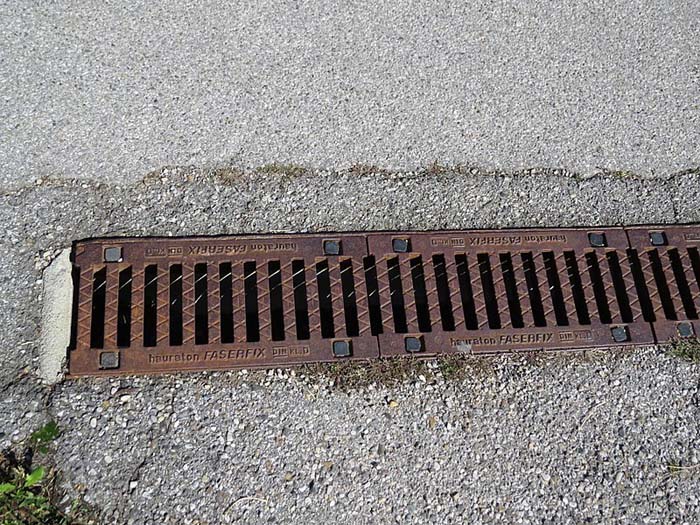
  • Efficient surface water management

A channel drain is an effective method for collecting and channeling surface water. Because of its long, linear shape, it can cover more ground, making it perfect for places where water collects.

Channel drains are a practical, long-lasting, and adaptable way to handle surface water. This helps with regulatory compliance, aesthetics, and safety.

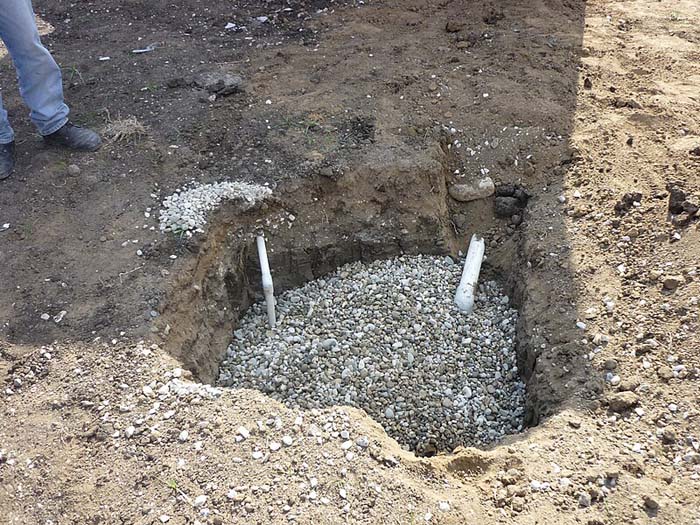
French drains have advantages.

French drain installation is a common method of controlling runoff and protecting against floods and other water-related problems. Their primary function is to regulate the flow of water in commercial and domestic landscapes.

  • Effective water management

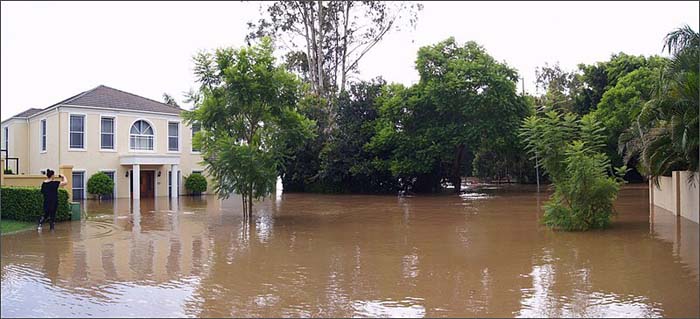
French drains are a practical solution to water pooling around buildings, gardens, and other structures. They help avoid foundation damage, erosion, and floods.

  • Basement flooding prevention

Installing French drains in a basement is one way to keep water out of the house. By diverting water from the foundation, they minimize the likelihood of water damage and flooding in the basement.

  • Decreased soil erosion

Implementing French drains, which restrict the flow of water, can help mitigate soil erosion in areas that experience water runoff or excessive rainfall. This is of paramount importance for hilly or sloped areas.

  • Gardens and landscaping protection

French drains help preserve landscape health by avoiding soil erosion and overwatering. This is a lifesaver in gardens where standing water can harm structures and plants.

  • Versatile applications

French drains have several potential applications, such as sports fields, commercial properties, residential yards, and other areas. They can easily adjust to various landscapes and meet the demands of water management systems.

  • Minimally invasive installation:

French drain installation may be more relaxed than other drainage methods. Their ability to complement the surrounding scenery means they will stay within the property’s curb appeal.

  • Cost-effective

While the exact price tag will depend on the intricacy and breadth of the drain installation, French drains are often considered a budget-friendly option. They are typically low-maintenance and, if installed correctly, can survive for a long time.

  • Prevents water damage to structures

 French drains are an excellent way to keep water away from foundations and buildings, preventing mold and structural problems while improving the property’s durability and stability.

  • Low maintenance

Once set up, French drains need very little maintenance. Typically, all it takes to keep them working is an occasional inspection to ensure they are clear of debris.

Which is Better French Drain or Channel Drain?

  • Customizable design

You can alter a French drain’s depth, length, and material to meet the demands of a particular project. Because of their adaptability, they can meet a variety of drainage needs.

French drains are generally considered an efficient and dependable solution for managing water and safeguarding property from the negative consequences of excess water.

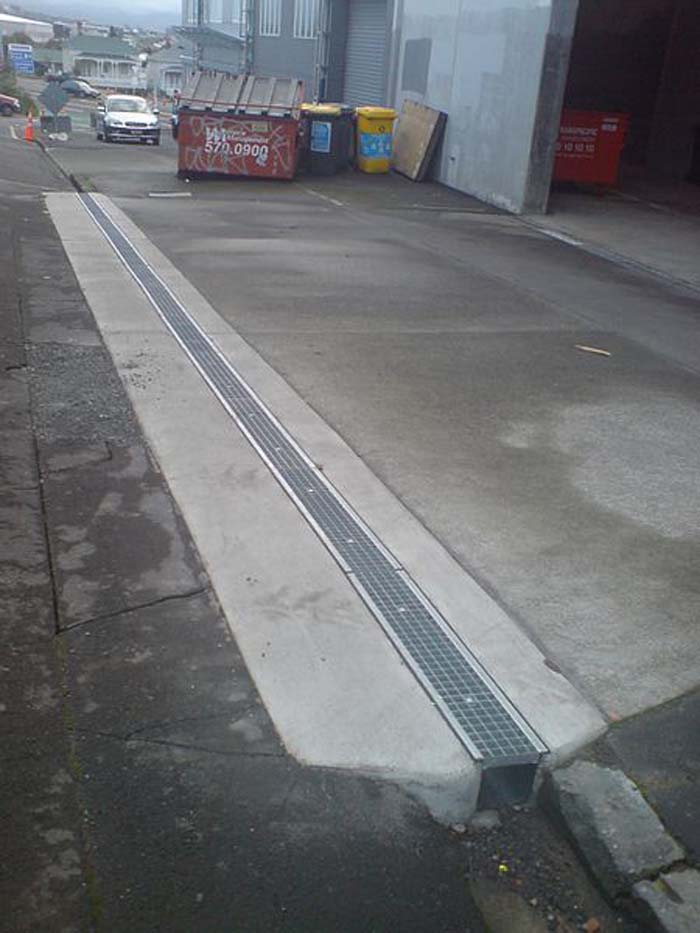
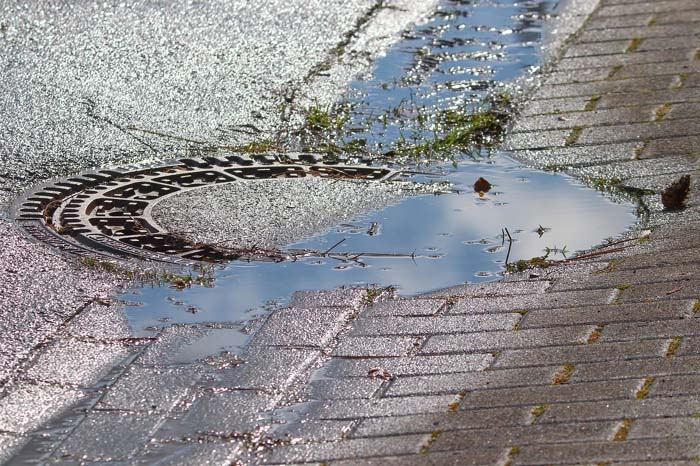
Can you drive over a channel drain?

Yes, driving over a channel drain is possible, but only if the drain is adequately reinforced to handle the anticipated traffic. Channel drains—also called trench drains—are frequently utilized when managing water runoff in locations such as garages, parking lots, driveways, and more.

Before you drive over a channel drain, think about these important things:

  • Drain cover/grate

The grate or cover that encases the channel drain should not disrupt vehicle traffic. Grates intended solely for pedestrians could sustain damage from heavy vehicles.

  • Installation quality

The stability of a channel drain depends on its placement. To prevent shifting or damage, ensure the drain receives proper support, bedding, and backfill before vehicles drive over it.

  • Maintenance

At all times, keep the channel drain clean and free of debris. Debris accumulation or clogging of the drain can weaken it and potentially cause damage if driven over.

If the drain and its parts are built, installed, and kept up to code, driving over a channel drain shouldn’t be a problem. If in doubt, consult a drainage expert or the manufacturer to ensure the drain’s suitability for vehicle traffic.

  • Load capacity

Please verify the channel drain’s load rating. Usually, we assign various traffic levels to drains, ranging from light foot traffic to heavy vehicle traffic. Before installing a drain, check its classification to ensure it can carry the expected load.

Which is better?

  • A French drain may be better for dealing with groundwater problems or water accumulating in expansive areas such as gardens or lawns.
  • A channel drain is a way to solve surface water problems on hard surfaces, such as areas surrounding pools, patios, or driveways.

Conclusion

A mix of the two may be necessary in some situations. A French drain can manage groundwater around a home’s foundation, while a channel drain can handle surface water in the patio or driveway area. Before selecting a final choice, consider the aesthetics, drainage problems, and maintenance needs.

How to Choose the Right Driveway Channel Drain

How to Choose the Right Driveway Channel Drain

By | Drainage Systems | No Comments

A specialized drainage system known as a driveway channel drain, also known as a linear drain or trench drain, manages surface water runoff and prevents pooling and flooding in adjacent areas and driveways. A standard design involves digging a long, narrow channel into the driveway and covering it with a grate or other material that lets water drain but keeps big objects and debris out.

How to Choose the Right Driveway Channel Drain

There are a number of important factors to consider when choosing a driveway channel drain that will last and effectively handle water. To help you make a well-informed decision, we have provided the following guide:

Assess drainage and water flow requirements.

  • Drainage Points

Find out where the water is coming from and where it needs to go, so you can install a driveway channel drain to channel the water efficiently to the right place.

  • Water Volume

Think about things like the slope of your driveway, the amount of precipitation, and the topography in your area. This will help you get an idea of how much water your driveway needs to manage.

Choose the right materials.

  • Metal/Steel

Extremely long-lasting; commonplace in high-traffic or industrial settings. They are capable of withstanding severe stress and huge loads.

  • Concrete

Strong and long-lasting, these driveways are perfect for commercial or high-traffic areas. Installation by an expert may be necessary.

  • Polymer or plastic

It is durable, simple to set up, and not heavy, making it the perfect driveway surface for low-traffic residential areas.

Selecting the Appropriate Load Rating

  • C250 or Above (Heavy Duty)

This product is ideal for driveways, industrial areas, or commercial driveways used by large trucks.

  • B125 (Medium Duty)

Driveways with modest traffic, such as vehicles and light trucks, are the perfect fit.

  • A15 (Light Duty)

It makes a good choice for residential driveways and locations with occasional foot traffic.

Consider installation and maintenance.

  • Maintenance Requirements

Channel drains with detachable grates or designs that are easy to access for cleaning and maintenance are good choices.

  • Easy to install

While some channel drains are simple enough for a do-it-yourselfer to install, others may need to be lighter and more complicated, necessitating the assistance of a professional.

Select the correct grate design.

  • Slip Resistance

Especially when it’s wet, make sure the grate has a good grip to keep you from slipping.

  • Grate Style

Make sure the design fits nicely with the rest of your driveway and the neighborhood. From plain slits to elaborate designs, the choices are endless.

  • Grate Material

Material: cast iron, steel, or plastic. Think about eye-catchiness and longevity.

How to Choose the Right Driveway Channel Drain

Ensure the correct design and positioning of the drainage.

  • Slope and Alignment

To direct water flow toward the drain, position it at a modest angle.

  • Integration with Existing Systems

Check that the channel drain fits in with the rest of the drainage system or has an exit point.

Consider the environment and aesthetics.

  • Driveway Design

When choosing a driveway channel drain, consider the style of your driveway.

  • Ecological Considerations

Engineers have designed certain drains with water filtration devices to lessen their environmental impact.

The purpose of a channel drain

A channel drain, also called a trench drain, collects and sends surplus moisture or surface water to a specific drainage system or outlet. Its goal is to appropriately manage water runoff and prevent erosion, flooding, and infrastructure and property damage.

Some typical applications and functions of a channel drain are as follows:

  • Recreational spaces and sports complexes

Channel drains are the best option for keeping recreational areas, stadiums, and sports fields free of waterlogging and in safe condition.

  • Drainage for Landscaping and Gardens

Landscaped areas and gardens commonly utilize them to control runoff and maintain healthy soil and plants.

  • Commercial and industrial applications 

Commercial and industrial settings commonly use channel drains to handle high volumes of water. Areas with heavy wastewater-producing machines, factories, or car washes commonly feature them.

  • Structures and Foundation Protection

Installing channel drains around building foundations diverts water away from them, lowering the risk of basement flooding or structural damage.

  • Surface Water Management

To avoid flooding or pooling, channel drains collect and reroute surface water away from walkways, parking lots, driveways, and patios.

  • Safety for Pedestrians and Vehicles

Channel drains improve safety by lowering the potential for slips and creating a more solid surface for both walkers and vehicles. They help divert water away from walkways and driveways.

The best channel drains

A number of criteria, including the installation setting, drainage capacity, application, durability, and load requirements, need consideration while selecting the most appropriate channel drains. When deciding which driveway channel drain is ideal for your needs, keep in mind the following brands and characteristics:

Applications:

  • Commercial/Industrial

Strong, large-capacity drains are necessary for industrial plants, garages, and parking lots.

  • Residential

You might not require heavy-duty channel drains for your garden, patio, or driveway. Additionally, you must consider how things look.

Popular Brands:

  • MEADRAIN

It is popular for its versatile and easy-to-install modular designs, perfect for a wide range of applications.

  • NDS

The company offers reasonably priced plastic channel drains that are great for homes and light businesses.

  • Josam

It is popular in demanding environments where long-lasting metal channel drains are required.

  • Zurn

Various high-quality plastic and steel channel drains are available to meet varying load requirements.

  • ACO

It is popular for its extensive line of channel drains designed for commercial, domestic, and industrial use. ACO offers a variety of materials and weight grades.

Materials:

  • Concrete

It is perfect for heavy-duty uses, but cumbersome to set up.

  • Stainless or galvanized steel 

The product is strong and appropriate for use at medium to high-stress levels.

  • Polypropylene/ Plastic

It is easy to carry and use for tasks that require little effort.

Key Features:

  • Durability and Corrosion Resistance

When considering the environment, choose materials that can withstand chemicals and weather.

  • Grate Options

Grates are available in various designs and materials. Choose based on factors such as safety, durability, and aesthetic appeal.

  • Drainage Capacity

Verify that the anticipated water flow is within the channel drain’s capacity.

  • Easy to Install

Depending on the model, some channel drains have height adjustments or snap-together designs that make installation a breeze.

  • Load Rating

Make sure the drain is strong enough to support the pressure you anticipate. Class ratings (such as C250, B125, A15, etc.) usually reflect this.

Use Cases:

  • Driveways and Garages

Prioritize things like load capacity and longevity.

  • Patios and Gardens

Lighter loads, as well as aesthetic considerations.

  • Commercial and Industrial Areas

Corrosion resistance, heavy-duty materials, and high load capacity.

Your specific requirements and circumstances will determine which driveway channel drain is ideal. Before buying, consider your installation needs, durability, and load capacity.

How long should a good channel drain last?

A properly constructed and set driveway channel drain has the potential to endure for decades, usually twenty to thirty years or even longer. Its durability, though, is conditional on a number of things:

  • Ecological Conditions

Factors include the surrounding environment and climate. Exposure to corrosive substances, freezing and thawing cycles, and high temperatures could reduce the drain’s useful life.

  • Maintenance and Cleaning

Routine maintenance is crucial to avoid erosion, clogs, and damage. A neglected driveway channel drain will eventually fail, but a well-maintained one will endure far longer.

  • Quality of Installation

Installation must be done correctly. Damage is more likely to occur in badly installed drains, which shortens their lifespan.

  • Use and Load

How often and how hard you use the drain can affect its lifespan. Drains in industrial environments or high-traffic areas could be prone to premature failure.

  • Quality of Materials

The materials selected significantly impact the drain system’s lifespan. Reinforced concrete, cast iron, or stainless steel are high-quality materials that can substantially increase the drain’s lifespan.

Pay attention to these details to ensure a driveway channel drain lasts and works reliably, whether installing one or assessing an old one. Regular inspections and early problem-solving can extend the lifespan of a channel drain system.

How do you size a channel drain?

The expected water flow, the drainage system’s capacity, the installation site’s conditions, and the expected water flow are all important considerations for determining the proper size of a channel drain. Here is a guideline for channel drain sizing:

  1. Compliance and safety
  • Safety

Think about slip resistance and how easy it is to maintain from a safety standpoint.

  • Building codes and regulations

Make sure you’re in full compliance by checking the local building codes.

  1. Estimate the drainage area.
  • Surface Area

Determine the total area of water that will be drained into the channel.

  • Grade and Slope

The gradient influences drain capacity requirements because a steeper slope accelerates water flow.

  1. Consider Grate Choices
  • Open Area

Grates with a larger opening can accommodate more water flow, but they are not the best choice for every kind of traffic.

  • Grate Design

The grate must be strong enough to support the anticipated traffic load and allow enough water to flow through it.

  1. Calculate the water flow.
  • Runoff Coefficient:

This element is significantly influenced by the type of surface. Concrete’s runoff coefficient is high, whereas grasses’ is low. You can estimate the effective drainage area by multiplying the total surface area by the runoff coefficient.

  • Intensity of Rainfall

Find out how much rain falls in your area on a regular basis. Local weather agencies generally have this data.

  1. Account for Drainage Infrastructure
  • Connection Points

Before installing the channel drain, ensure it will fit in with the current drainage system.

  • Outflow Capacity

Verify that the catch drains or storm sewers downstream of the driveway channel drain can handle the flow.

  1. Assess the application.
  • Traffic Load

Think about the different kinds of pressures that the driveway channel drain will have to handle. The weight a parking lot drain must support is far greater than that of a backyard garden.

  • Residential or Commercial

Find out if the driveway channel drain will be installed in a residential area, such as a pool deck, patio, or driveway, or in an industrial or commercial area, like a loading dock or parking lot.

  1. Determine the drain capacity.
  • Channel Size

Knowing the expected flow rate, you can select a channel drain accordingly. Higher flow rates necessitate deeper or larger channels.

  • Flow Rate

Calculate the flow rate by plugging in the effective drainage area and rainfall intensity. To estimate peak flow, use formulas like the rational method.

While sizing a driveway channel drain, consider infrastructure integration, load capacity, and water flow. After collecting relevant data and analyzing the surrounding environment, determine your demands for the drain’s features, capacity, and size.

Conclusion

When selecting the best driveway channel drain, consider the driveway’s material, load rating, water flow, installation, and maintenance needs. Make sure it complies with all applicable local standards, considers environmental factors, and meets your aesthetic, functionality, and durability demands. Consult a drainage specialist or contractor for expert assistance and installation if necessary.

Channel Drain and a Trench Drain - What Is The Difference?

Channel Drain and a Trench Drain – What Is The Difference?

By | Drainage Systems | No Comments

A channel drain is one drainage system that can be effectively used when managing surface water runoff. A long, narrow channel or trench collects and redirects water away from a flood—or pooling-prone area. The grate covering it is typically detachable. Parking lots, patios, driveways, and areas surrounding pools are just a few examples of the many industrial, commercial, and residential locations that frequently use these drains.

Channel drains are made to look good in addition to their practical use. Grates suitable for covering the channels are available in various materials and patterns to complement their natural setting, including metal, plastic, or composite. Because of their adaptability, channel drains can be built in various layouts to suit different site conditions.

Here are the main differences between a channel drain and a trench drain:

Channel Drain 

  • Installation

Channel drains’ prefabrication makes them more convenient to install. Modular parts are available to create various configurations.

  • Materials

These drains are often made of stainless steel, polymer concrete, or plastic. They often have a detachable grate on top for easy maintenance and to keep dirt out.

  • Use Cases

Patios, pool decks, driveways, and sidewalks are common areas for installing channel drains in commercial and residential areas to control surface runoff. They are also used frequently in some industrial settings.

  • Design

A channel drain is a type of prefabricated water collection and conveyance system that is narrow and lengthy. It is often set up at or just below ground level and features a specified width and depth.

Some of the key benefits of channel drains are:

  • Ease of maintenance

To keep them in good working order for as long as possible, most channel drains come with detachable grates that you can easily maintain and clean.

  • Customizable designs

Channel drains serve an important drainage purpose while blending in with their surroundings, thanks to various grate colors, patterns, and materials.

  • Safety enhancement

Reduced surface water runoff from channel drains makes wet surfaces less slippery, making them safer for vehicles and pedestrians.

  • Effective water management

Channel drains decrease the likelihood of structural damage, erosion, and flooding by collecting and directing water into a collecting point or drainage system.

Channel drains are a dependable solution for surface water management and water collection problem prevention. They help make outdoor spaces safer and more durable.

Trench Drain

Trench drains, sometimes called line or channel drains, are drainage systems that gather and direct runoff from a surface. The standard design element is a long, narrow trench with a detachable cover or grate that directs water flow into the trench and eventually into a drainage system or another specified exit. Trench drains are widely used in a variety of contexts, including:

Channel Drain and a Trench Drain - What Is The Difference?

  • Stadiums and Sports Fields 

The goal is to ensure the fields and stands remain dry during the rain.

  • Highways and Roads

It is important to drain water properly and avoid pools of water.

  • Residential Areas

In order to avoid flooding, place them along pool decks, patios, and driveways.

  • Industrial and Commercial Areas

Specifically, control water flows from wide areas like warehouses, loading docks, and parking lots.

Trench Drain

  • Installation

Because trench drains are custom-built, concrete work, forming, and digging are often required for their construction.

  • Materials

Due to their increased weight and traffic exposure, trench drains typically consist of concrete or other robust materials. They incorporate a detachable grate to enhance protection and simplify maintenance.

  • Use Cases

Trench drains are typically preferred for larger-scale projects requiring better water flow control, such as industrial areas, parking lots, roads, and airport runways.

  • Design:

People often use the term “trench drain” to describe an on-site, linear drainage system. In order to create the drainage channel, a lengthy trench is excavated into the earth and subsequently lined with concrete or another material.

Some major benefits of trench drains are as follows:

  • Advantages for the Environment 

Trench drains efficiently direct runoff, lessening the likelihood of soil erosion and water pollution. This helps create a healthier environment and fosters sustainable water management practices.

  • Versatility

Trench drains can benefit many different types of surfaces. Some examples are industrial and commercial areas, patios, parking lots, pool decks, walkways, and driveways. Their adaptability makes them a go-to for a wide range of tasks.

  • Customizability

Trench drains are modular, so they are adaptable in terms of depth, width, and length. This adaptability allows for the development of custom-made drainage systems to meet the specific needs of each project.

  • Space Efficiency

Trench drains are narrow and linear, designed to collect water efficiently without taking up too much room. This would be a godsend in places where conventional drainage systems would be too cramped.

  • Sturdiness and Longevity

Materials such as polymer, stainless steel, or concrete are commonly used to construct trench drains. This ensures their long-term durability and functionality, allowing them to withstand extreme weather and severe traffic.

  • Decreased Accidental Risks

Trench drains make places with heavy foot traffic safer by directing surface water away from walkways and other potential hazards.

  • Aesthetics

There are ways to make trench drains look like they don’t even exist. Because they are available in various finishes and styles, you can find one that works with your home’s decor or the surrounding scenery. Decorative tiles or grates can help to cover some trench drains, making them look cleaner and more beautiful.

  • Low Maintenance

Trench drains require less maintenance than other types of drainage systems. Their design, which allows for easy cleaning and inspection, makes maintaining their efficiency over time easier.

  • Effective water management

By collecting surface water efficiently, trench drains reduce the likelihood of pooling water, erosion, and flooding. This is particularly beneficial in areas experiencing heavy rainfall or directing water away from structures.

Key Differences between a Channel Drain and a Trench Drain

  • Material and durability:

Industrial and high-traffic areas frequently use trench drains. For this reason, they are usually built to withstand heavier loads and be more durable. Although long-lasting, channel drains are only suitable for light to medium loads.

  • Installation

Since they come prefabricated, channel drains are typically easier to install than trench drains, which need more building and customization.

  • Scale and scope

Larger-scale industrial projects use trench drains more frequently, whereas smaller residential areas use channel drains.

Conclusion

Both systems aim to manage surface water efficiently. Your project’s anticipated load, scale, and preferred simplicity of installation are some of the factors that will determine whether you should choose a channel drain or a trench drain.

How Deep Should a Channel Drain be?

How Deep Should a Channel Drain be?

By | Drainage Systems | No Comments

Considerations such as location, anticipated water flow, and use dictate the depth of a channel drain. To assist in determining the appropriate depth, below are some general guidelines:

  • Local Regulations

Before installing a channel drain, check that the depth and materials comply with your local building laws or regulations.

  • Load Requirements

The drain must be deeper and physically reinforced to accommodate larger loads in an area with automotive traffic, such as a parking lot or driveway.

  • Water Flow

If a strong water flow is anticipated, proper drainage necessitates deeper channel drainage with a larger capacity.

  •  Purpose

Think about why you want to install the channel drain. For low-volume surface water runoff (such as from a patio or driveway), a deep drain is optional, just as it would be for high-volume, heavy-load applications (such as industrial facilities).

Taking all of this into account, standard channel drain depths are:

Light Duty:

The depth ranges from two to four inches. This depth is ideal for smaller residential spaces, walkways, and patios.

Medium Duty:

A depth of four to six inches is ideal for areas with little vehicle traffic, such as small parking lots or driveways.

Heavy Duty:

A depth of six inches. This depth is suitable for commercial sites, industrial locations, or regions with high volumes of vehicle traffic.

Do channel drains need a trap?

Yes, it depends on the location and application of the channel drain, but a trap is usually necessary. In order to comprehend the circumstances in which a trap could be useful, here is a concise explanation:

A Trap’s Purpose:

A trap is an effective plumbing device for preventing sewage smells and gases from escaping. It holds a small amount of water and forms a water seal. As a bonus, it prevents small bugs and debris from entering the drain.

Applications Where You Need Traps:

  • Connecting to Sewer Lines

If the channel drain is directly attached to a waste system or sewer, a trap is required to protect against gas backflow and maintain adequate cleanliness.

  • Commercial Bathrooms or Kitchens

Additionally, in order to control odors and meet construction requirements, these sections must have traps.

  • Interior Drainage

When building an interior channel drain, such as in a basement or garage, a trap is typically required to prevent the entry of sewage gases into the building.

Applications for which you may not need traps:

  • Trap Alternatives:

Use backwater valves or alternatives instead of traps to avoid gas leakage or backflow in specific drain types.

  • Local Construction Codes and Regulations

To determine if a trap is necessary for a particular type of drain, check your local construction codes and regulations. Compliance with local regulations is critical for safety and avoidance of legal trouble.

  • Stormwater Systems

Incorporating the channel drainage into a larger stormwater management system may eliminate the need for a trap. Engineers specifically design these systems to regulate rainfall and runoff without requiring connections to sewage systems.

  • Outdoor Drainage

You might not need a trap for outer channel drains like those in landscapes, parking lots, or driveways. When sewage gases are not an issue, these drains frequently go straight to a natural drainage area or stormwater system.

Do channel drains need a fall?

Yes, indeed, channel drains normally require a slope or fall to provide adequate drainage. For this reason, you should be aware of the following:

A Fall’s Purpose

A fall, often known as a slope, directs water in a drainage system in the right direction towards a catchment area or an outlet. When water does not fall, debris buildup, blockages, and other drainage issues can occur as the channel becomes stagnant.

How Much Fall Is Needed?

Slopes of 1 to 2 cm per meter are typically optimal for channel drainage. This small gradient allows water to flow without producing runoff speeds that could cause erosion or other problems further downstream.

  • Design Considerations

It is important to grade the area properly to provide the necessary slope while installing channel drainage. To accomplish this, you can dig the installation area and position the channel drainage at the desired slope. Also, make sure the outlet is facing the slope in the right direction.

  • Consequences of Insufficient Fall

Installing a channel drain without enough fall can cause water to pool inside the drain. This can cause it to overflow during heavy rains, cause bacteria and algae growth because the water is stagnant, and even increase the likelihood of silt buildup.

How much slope does a channel drain need?

A number of variables, such as the relevant construction codes and regulations, the drain’s length, and anticipated water flow, determine the necessary slope for a channel drainage, linear drain, or trench drain. Usually, experts advise a minimum slope to ensure proper drainage and prevent water collection. In general, these are the rules:

How Deep Should a Channel Drain be?

Steeper Slopes

You can utilize a 1/4-inch per foot (approximately 2% grade) in places with heavier precipitation or when you need to drain water quickly. Proper drainage is crucial in industrial or commercial environments, leading to the frequent use of a steeper slope.

Common Slope

In actual practice, we often employ slopes of 1/8 inch per foot or around 1%. This slope’s greater gradient improves water flow efficiency and lessens the likelihood of trash accumulation in the drain.

Minimum Slope

Most channel drains require a minimum slope of 1/16 inch per foot, which is usually more than enough for home and light business use.

Can channel drains be cut?

Yes, it is possible to cut channel drains, but the process is challenging. The following are the most important aspects to take into consideration:

Compatibility

Before finishing the cut, ensure it is compatible with the grates, end caps, and other parts of the channel drain. Proper sealing is essential to avoid leaks.

Type of Material

Channel drains are available in various materials, including concrete, metal, and plastic. The material determines how easy they are to cut.

Precision

When cutting channel drains, precise measurement is critical to ensure they fit and line up with the rest.

Safety

When you cut, always wear protective gear, like gloves and goggles. To stay safe, follow these steps.

Proper Tools

Equipment specifically for cutting channel drains is required. When working with plastic, a circular saw or handsaw with a blade designed to cut plastic can do the trick. A metal cutting tool, such as an angle grinder or reciprocating saw, may be ideal. For concrete, a diamond blade or concrete saw is necessary.

Professional Advice

If you lack expertise in cutting materials, or if the task requires precision, talk to an expert or get some help.

Conclusion

When planning a drainage system, the depth of the channel drain must be carefully considered. Consider the installation location’s unique demands when making this decision. This impacts the system’s durability, functionality, and capacity.

How Does Channel Drainage Work?

How Does Channel Drainage Work?

By | Drainage Systems | No Comments

Channel drainage, sometimes called trench or linear drainage, aims to manage surface water runoff. This system routes surface water runoff into a regulated path for collection and disposal. It is critical to ensuring the functionality, longevity, and safety of a wide range of infrastructure, including industrial plants, parking lots, roads, sports fields, sidewalks, and other types of infrastructure.

How Does channel drainage work?

The following is an in-depth explanation of how channel drainage operates:

Design and Structure

  • Polymer concrete, plastic, or concrete are typically used to construct the long trenches or channels that make up a channel drainage system. Lids and grates block these passages, allowing water to enter but preventing big objects and dirt from becoming stuck.

Collecting Runoff from the Surface 

  • Channels are best placed at the base of sloped surfaces, sidewalks, or roads. This is due to the high concentrations of water in the area. These canals receive precipitation runoff via the grates’ openings.

Incorporation with Existing Drainage Systems

  • Retention basins, ditches, and underground storm drains are larger stormwater management systems often linked to channel drainage systems. This connection transfers water from high-risk locations to designated treatment or disposal facilities.

Conveyance

  • The channel’s primary function is to guide water toward an outlet or drainage point after entering. Channels that are slightly sloping are commonly used for effective water movement.

Types of channel drainage

  • Channel drainage systems come in various kinds, each tailored to a unique set of uses and loads. Heavy-duty channels are developed for industrial sites and roads where large vehicles are frequently present, whereas light-duty channels are more suitable for pedestrian zones.

Cleaning and maintenance

  • Channel drainage systems need regular servicing to ensure their continued functionality. As part of this process, you will need to check for damage, clear obstructions, and remove debris. It is important to clean the grates regularly to ensure water can easily flow into the channel and fix any damage or wear quickly.

Installation Considerations

  • Effective channel drainage relies on proper installation. This includes checking the channels for alignment, stability, and good integration with other drainage components. It is also important to select grates or coverings suitable for the expected traffic and weight.

How to Install Channel Drainage

A channel drain, sometimes called a trench drain, is an effective technique for handling surface water in patios, driveways, or any other area prone to water accumulation. This tutorial outlines the process of installing channel drainage.

Tools and materials

  • Crushed stone or gravel
  • Drainage pipes to connect to the drain system.
  • Level
  • Channel drainage (including grates and end caps)
  • Protective gear (safety goggles, gloves)
  • Trenching tool and shovel
  • Tape measure
  • Concrete mix
  • Use PVC cement or other adhesives as necessary.

Installation Guide: Step-by-Step

Step One: Plan the installation.

  • Find the drainage route

Figure out the best course of action for the water. This could be a garden area, a stormwater drain, or another suitable drainage location.

  • Measure the area

Calculate the channel drain’s length. Layout considerations should include the drain’s beginning and ending location.

Step Two: Dig the trench.

  • Mark the path

Demarcate the trench’s location with pegs or paint.

  • Excavate the trench

The channel drain’s dimensions determine its width and depth. For the base plus drain, aim for a width of 6–12 inches and a depth of 2–4 inches of gravel. The trench needs a small slope of around 1/8 inch per foot to direct water away from obstacles.

How Does Channel Drainage Work?

  • Ensure Proper Slope

Using a level, verify the proper slope of the trench.

Step Three: Trench Preparation

  • Gravel Base Addition

Spread 2–4 inches of gravel across the trench’s base for drainage and channel drain support.

  • Gravel Compacting

Use a tamper or an equivalent tool to compact the gravel and lay a strong foundation for the drain.

Step Four: Channel Drain Installation

  • Channel Drain Placing

Before placing the channel drain in the trench, align it with the drainage plan.

  • Connecting Drainage Pipes

If necessary, connect the channel drain to an existing drainage system, such as a pipe. Always use strong, airtight connections.

  • Adding End Caps

The channel drains should be fitted with end covers.

Step Five: Set the drain in concrete.

  • Mix Concrete

To mix the concrete, follow the instructions in the bag.

  • Pour Concrete

Before filling the trench, pour concrete around the channel drain so that only the grate area remains exposed.

  • Concrete Leveling

Leveling the concrete with a trowel ensures it’s leveled with the ground.

  • Allow to Cure

Allow the concrete to cure per the manufacturer’s guidelines.

Step Six: Finish the installation.

  • Grates Installation

After the concrete has hardened, place the grates on top of the channel drain.

  • Drainage Test

Ensure there is no clogging or pooling when pouring water down the channel drain.

Step Seven: Cleaning

  • Remove Excess Material

Remove any excess debris, dirt, or concrete from the vicinity.

  • Properly Dispose of Waste 

Be sure to dispose of all waste products per the regulations set by your locality.

Where does water go in a channel drain?

A drainage system is usually set up to handle runoff or surplus water, and the water that flows into a channel drain usually goes into that system. A general outline of the water’s fate is as follows:

Structure of the Channel Drain

  • A channel drain, sometimes called a trench or line drain, is a long and narrow trough that collects water from the surface. Pool decks, parking lots, driveways, patios, and other locations frequently use this material to control water runoff.

Flow-to-Drainage System

  • The channel drain collects water, which then enters a drainage system. This system can include various drainage infrastructure, such as storm sewers, catch basins, and underground pipes.

End Destination

  • The drainage system’s design determines the water’s ultimate destination. The possible forms include:

Municipal Storm Sewer

Channel drains in cities and suburbs often lead into the storm sewer system, which empties into a lake or river, retention pond, or treatment plant.

Percolation Area or French Drain

Restoring groundwater levels can be achieved by redirecting runoff from channel drains into a percolation area or French drain, where it slowly seeps into the earth.

Detention or Retention Ponds

Some drainage systems hold water in detention or retention ponds either temporarily or permanently, then release or evaporate it over time.

Other Discharge Points:

Swales, ditches, or other naturally occurring drainage channels may receive the water in less populated or remote places.

Is it necessary to set channel drains in concrete?

Yes, these drainage systems should be set in concrete for several significant reasons, including the following:

Aesthetic Incorporation

Channel drains can be set into concrete to mix with other concrete surfaces, such as patios, sidewalks, or driveways. This makes everything look better and more cohesive.

Movement Prevention

Adequate embedment of the channel drainage in concrete reduces its vulnerability to environmental conditions like freeze-thaw cycles, ground settling, and other ecological factors. This stability ensures proper drainage and a lower chance of water leakage.

Enhances Durability

The channel drain will last many years with concrete as its base. This is of utmost importance in places that experience elements that cause corrosion, heavy traffic areas, or areas with severe weather.

Ensures Correct Alignment

Concrete can keep the channel drainage in the proper position and ensure it slopes correctly to direct water to the drainage outlet. Water can accumulate and cause structural damage or safety issues, which helps prevent problems from getting worse.

Strength and stability

Industrial facilities, patios, and driveways are common places to see channel drains, linear drains, or trench drains installed. This is because of the high volume of traffic and the weight of the objects placed on them. Placing them in concrete ensures they will not collapse, shift, or sag when subjected to pressure.

Conclusion

Channel drainage is generally considered a successful method for managing surface water. By directing water to suitable outlets, it reduces the likelihood of erosion, floods, and other water problems. Channel drainage also aids in infrastructure maintenance and protects against damage due to uncontrolled runoff.

All You Need to Know About Drain Grating

All You Need to Know About Drain Grating

By | Drainage Systems | No Comments

Drain grating—also called grates or drain covers—facilitates the passage of water and other fluids into a drainage system while blocking the entrance of debris or larger particles. It provides critical public safety, construction, and urban planning services.

Types of Drain Grating

Drain grates come in various materials, sizes, and shapes to meet various needs. Examples of common types are:

  • Decorative Grating

It is available in various patterns and styles for commercial and residential landscaping.

  • Mesh Grating

Mesh grating, constructed from a grid-like pattern of wires or bars, is widely utilized in domestic and commercial areas because of its smaller openings.

  • Trench Grating

This is ideal for narrow, lengthy drains like those on driveways and streets. Steel and cast iron are two of the many possible construction materials.

  • Slotted Grating

It displays narrow openings rather than wide bars. Pedestrian-frequented places commonly install this type for increased security.

  • Heel-Proof Grating

They are carefully crafted with narrower openings to avoid snagging high-heeled footwear. This style is popular in areas where people frequently walk.

  • Bar Grating

The parallel bar structure enables water to pass through easily. Driveways and industrial zones commonly feature these surfaces, which are ideal for heavy traffic.

  • Perforated Grating

It includes a grid of drainage holes, either square or circular. Because of its aesthetically pleasing nature, it is frequently used in residential applications.

Aesthetic needs, expected traffic, location, and safety worries dictate the most appropriate drain grating.

Materials

A variety of materials are suitable for use as drain grates, such as:

  • Composite/Plastic

They are ideal for light commercial and residential applications. This is due to its lightweight and corrosion-resistant construction.

  • Aluminum

This product is ideal for less heavily populated locations as it is lightweight and resistant to corrosion.

  • Steel

Provides durability and protection from corrosion. This makes it an excellent choice for commercial and industrial environments.

  • Stainless Steel

This material is ideal for places exposed to saltwater or chemicals. It combines strength with great corrosion resistance.

  • Cast Iron

Strong and long-lasting, it finds frequent use in heavy-duty applications.

Applications

A drain grating is vital to keep trash from the drainage system while enabling water to flow freely. Drain gratings are commonly used for the following purposes:

  • Residential applications

Homes sometimes install drain gratings in their garden spaces, patios, and driveways. This is intended to regulate rainwater flow and prevent accumulation.

  • Pedestrian areas and sidewalks

Pedestrian zones, plazas, and sidewalks sometimes have drain gratings installed to collect and divert rainwater away from potentially dangerous standing water.

  • Landscaped areas

Landscapes and park areas install drain gratings to prevent waterlogging and control irrigation runoff.

  • Garages and parking lots

In order to keep the surfaces of parking lots and multi-story garages safe for both people and automobiles, drain gratings help to send water to drainage systems.

  • Recreational areas and swimming pools

Recreational areas like water parks and pools install drain grates to manage water and ensure safety.

  • Road and street drainage

Road and street drainage systems employ drain gratings atop curbs, trench drains, and catch basins to help control rainwater runoff and avoid flooding.

  • Commercial and industrial facilities 

Drain gratings are commonly used in commercial and industrial facilities to control the flow of wastewater and other spills while keeping pollutants out of the drainage system.

Importance of Drain Grating

Drain grating is essential in the drainage system in many different settings, such as public parks, sidewalks, roads, and industrial sites. Drain grating is necessary for the following reasons:

  • Longevity and durability

Reinforced plastics, stainless steel, and cast iron are common long-lasting materials for drain grates. As a result, they will last longer and require less maintenance, even when subjected to heavy use and severe weather.

  • Drainage efficiency

Grates prevent larger debris from entering the drainage system but allow water to flow through. Avoiding clogs, which can create water pooling or flooding on surfaces, which can damage infrastructure or pose hazards, helps keep drainage efficient.

  • Protecting the environment

Grates help mitigate water and environmental pollution by capturing larger particles and blocking their entry into the drainage system. The result is less pollution and higher-quality water.

  • Structural integrity

Engineers design drain grates to withstand heavy loads, especially in industrial settings and roadways. They help keep the drainage system strong by absorbing and distributing some load elsewhere.

  • Accessibility and maintenance

Well-designed drain grates make it simple to clean and maintain the drainage system. This allows for routine maintenance, which is important for the system’s longevity and performance.

  • Safety

Drain grates help to prevent animals and people from falling into drainage openings. This is of the utmost importance in heavily populated places, as it lowers the likelihood of injuries and accidents.

  • Aesthetics

Drain grates are practical and can enhance a space’s visual appeal. Modern grates often feature aesthetically pleasing patterns and materials, helping them blend in with their surroundings, whether natural or city landscapes.

Public, private, and commercial infrastructure use drain grating. It is also essential for drainage systems to be aesthetically pleasing, efficient, and safe.

All You Need to Know About Drain Grating

Maintenance

Maintaining your drain grating is crucial to avoid flooding, clogs, and other safety risks. To keep drain gratings in good repair, below is a detailed guide:

  1. Inspecting Regularly

Inspect the drain grating frequently for damage, wear, or clogs. Also, check for misalignment, rust, debris buildup, or cracks.

  1. Cleanup
  • Chemical Cleaners

To remove more stubborn stains, such as rust, use a chemical cleaner that is safe for metal or the material of your drain grating.

  • Pressure Washing

Use a pressure washer to remove grime and dirt from the grating, paying special attention to difficult-to-reach regions.

  • Remove Debris

Ensure the drain grating and the surrounding area are free of dirt, litter, leaves, or other material. You can use tools like vacuums, shovels, or brooms for this task.

  1. Repair and replacement
  • Repair minor damage

Welding and other metalworking procedures can correct small misalignments or cracks.

  • Replacement of Damaged Gratings:

Install a new drain grating if the old one has severe corrosion or damage. Verify that the replacement grating’s size and design are an exact fit.

  1. Preventive Precautions
  • Install debris catchers

To prevent bigger pieces of garbage from getting into the drain, use traps or screens made of mesh.

  • Ensure a proper fit

Install the grating snugly to prevent it from moving or wobbling. Secure it with the right fasteners.

  • Coat with Anti-Rust Agent

If the grating rusts easily, treat it with an anti-rust preventive material to prolong its life.

  1. Ensuring Safety 
  • Make Sure there are No Trip Hazards 

To avoid trip hazards, ensure the drain grating is flat with the surface around it.

  1. Schedule regular maintenance

Establish a routine for checking, cleaning, and fixing drain gratings. The routine might be weekly, monthly, or seasonal, depending on your surroundings and drainage demands.

Following these steps is as simple as keeping a drain grating functional, safe, and in good condition.

  1. Compliance with Regulations

Ensure your drain gratings are safe per the local construction codes. You must meet the material requirements, spacing, and load-bearing capacities.

Safety Considerations

A drain grate, or a drain cover, is necessary to keep drainage systems in good working order and remove debris. Nevertheless, there are crucial safety factors to keep in mind to prevent them from becoming dangerous in and of themselves. To ensure the safety of a drain grating, here is a detailed overview:

All You Need to Know About Drain Grating

Environmental Considerations

  • To reduce your environmental impact, use eco-friendly materials whenever possible.
  •  Think about how toxic spills or chemicals can affect the grating material in an industrial setting.

Slip Resistance:

  • Consider applying surface treatments or coatings to enhance traction and lessen the likelihood of accidents.
  • Gratings should be serrated or have a rough surface to reduce the likelihood of wet slips.

Preventing Tampering and Ensuring Security

  • Theft prevention should be a top priority; therefore, think about using anti-theft materials or designs.
  • To stop someone from taking or tampering with gratings, lock them or use fasteners.

Right Sizing and Fit

  • Make sure that the drain grating bars don’t have enough room to trap small objects or shoes.
  • To prevent dislodging or movement, gratings must fit snugly within their frames.

Accessibility

  • Adhere to accessibility requirements in public areas so that people using wheelchairs or with other mobility challenges do not encounter obstacles.
  • Maintaining and cleaning the gratings should not require much time or specialized tools.

Pedestrian Safety

  • Use beveled edges to ensure that there are no trip hazards.
  • Use designs that reduce the likelihood of trips and falls, or install drain gratings in areas with heavy foot traffic if possible.

Vehicle Safety

  • Place more substantial gratings in areas with a lot of heavy vehicles or foot traffic.
  • To prevent damage to cars or jolts, make sure that the gratings in roadways or parking places are level with the surface.

Material quality and structural integrity

  • To avoid collapse or breaking, you should routinely inspect for signs of damage, corrosion, or wear.
  • Construction materials for drain gratings should include high-strength plastics, steel, or cast iron that can withstand pedestrian and vehicular use.

Drainage Effectiveness

  • Remove any debris that could block the drainage by cleaning the gratings on a regular basis.
  • Ensure the gratings allow enough water to flow through them to prevent flooding or pooling.

Drain gratings should serve their purpose without endangering the ecosystem, vehicles, or people. Addressing these safety concerns is essential to accomplishing this. To achieve this, inspections, maintenance, and regular compliance with safety requirements are necessary.

Conclusion

A drain grating is an absolute must for safety and drainage. By learning about maintenance needs, materials, types, and applications, you can choose the most appropriate grating for your purposes and guarantee its long-term efficiency.

Guide on How To Install a French Drain

Guide on How To Install a French Drain

By | Drainage Systems | No Comments

The purpose of a French drain is to redirect groundwater and surface water away from a particular location. It is sometimes referred to as a rock drain, trench drain, or weeping tile. Usually, it helps to keep water from building up around basements, foundations, or other places where too much water could create unwanted dampness or damage things. A French drain works on the idea that water travels the route of least resistance. Also, the drain makes it obvious where to go away from low-lying areas and buildings.

Components of a French Drain

  • Outlet

A lower-lying area, a ditch, or a storm drain can be an appropriate outlet for the water that collects at the French drain’s end.

  • Drain Pipe

At the base of the excavation is a pipe with holes cut into it. Water can enter from the top and sides through this pipe. It then directs the flow away from the troublesome location.

  • Filter Fabric

Then, to keep the pipe clear of debris and dirt, it is laid along the trench and covered with gravel.

  • Trench

You should dig a trench wherever you wish to install a French drain. A standard slope of one inch for every eight feet will provide adequate drainage.

– Step to follow to install a French drain

You should install a French drain to control water in a basement or yard or avoid floods. It is a drainage system that redirects water away from a certain area. In general, a French drain installation entails the following steps:

Materials Needed

  • Gravel rake
  • Wheelbarrow
  • Geotextile or Landscape fabric
  • Gravel (1-1/2 – 3/4 inches)
  • PVC cement (if needed)
  • Level
  • Saw (for cutting pipe)
  • Rubber mallet
  • Trenching tool or Shovel
  • Perforated drainage pipe

Plan and Prepare

  • Identify the Problematic Area

Find out whether the water flows in a specific direction or pools elsewhere. A French drain is important for directing water away from low-lying regions or structures.

  • Drainage System Design:

The French drain must be carefully planned out, starting at the place where water gathers and ending at the point where it’s either absorbed or exists. There has to be a downward for water to flow.

Look for Underground Utilities

Contact the relevant utility providers before beginning excavation to prevent damage to underground pipes, cables, or other utilities.

Installation

  • Dig the Trench:

The first step is to lay out your route by digging a trench. The trench width should be between 6 and 12 inches, and the depth should be 12 to 18 inches. The volume of water you’re handling, and the diameter of the pipe will determine the width and depth.

  • Create a Slope

To direct water away from the drain, you need a minimum slope of one inch for every eight feet in length. Use a level to verify the slope.

  • Add Landscape Fabric

Before you lay pipes or gravel, line the trench with enough geotextile or landscaping fabric to fold over the edges. If dirt gets stuck in the pipe, this cloth will keep it from clogging.

Adding the Drainage Pipe

  • Lay Gravel Base:

Pour gravel into the trench to a depth of a few inches. This gives the drainage pipe a solid foundation.

  • Install Perforated Pipe

After spreading gravel, set the perforated drainage pipe on top. Make sure the holes point downward so water may flow into the pipe.

  • Connect Pipes if Needed

Use pipe connectors or PVC cement to make sure the connections between pipes are secure. Direct the flow of water by using a non-perforated pipe or capping open ends.

  • Spread Gravel Over the Pipe

Make sure to cover the pipe with gravel completely. Before you drape the landscaping fabric over the gravel, make sure you leave adequate room.

Guide on How To Install a French Drain

  • Fold Over the Fabric

Carefully cover the gravel with the landscape cloth by folding it over it. Therefore, dirt won’t be able to clog the system as easily.

Final Touches

  • Drainage Test

After installation, running water through the system to test the French drain is best. This will ensure that the water can flow through and out properly.

  • Add Grass or Landscaping

After filling the trench, you can add landscaping elements or grass. This will merge the French drain more seamlessly with your yard’s landscape.

  • Backfilling the Trench

Cover the fabric with soil and fill the trench up to the ground level. Compact and level the earth by tamping it down.

Safety Tips

  • Use extreme caution when handling power tools and heavy materials.
  • When digging, always wear safety gear such as boots and gloves.

Additional Tips

  • Regulations and Permits

Prior to installation, make sure you comply with any local regulations.

  • Safety Measures

When excavating, you should always contact a local utility locater service to ensure you don’t hit any hidden utilities.

  • Advice from Experts

When dealing with large-scale drainage or complex installation problems, it may be wise to seek the advice of a civil engineer or drainage expert.

Benefits of installing a French drain

There are a number of advantages you can get when you install a French drain

  • Increased Property Value

Effective foundation protection and water management can raise the value of your property by enhancing the landscape and decreasing the likelihood of damage.

  • Water Management

French drains are a great way to prevent water from flooding and pooling in places where it tends to collect. This is especially beneficial in areas where the soil drains poorly or when rainfall is frequent.

  • Preventing Basement Flooding

Basements are notorious for water seepage, which can cause floods, mold growth, dampness, and other home problems. A French drain can lessen the chances of water flooding the basement by directing water away from the structure.

  • Decreased Soil Erosion

Lawns, gardening areas, and other landscape features are vulnerable to soil erosion due to excess water. French drains aid soil stabilization and erosion prevention by redirecting water away from unstable areas.

  • Preserving Landscapes and Yards 

French drains can help keep your yard and landscaping in good condition by avoiding soil erosion and waterlogging. This becomes paramount when dealing with uneven terrain or slopes.

  • Affordable Solution

If you want to save money, French drains are a good alternative to costly repairs or drainage systems due to water damage. Compared to other drainage technologies, its installation can be easier and cheaper.

  • Foundation Protection

Problems with the building’s foundation, such as shifting and cracking, might result from standing water near the foundation. Water can be directed away from your home’s foundation with the help of French drains. This lowers the likelihood of structural damage.

Disadvantages of installing a French drain

French drains are a common way to control water runoff in many agricultural, commercial, and residential landscapes. They are not without their drawbacks:

  • Impact on the Environment 

Poorly channeled drainage can result in environmental problems, such as the pollution of nearby water supplies or detrimental environmental impacts. Planning and considering environmental factors is essential when building a French drain.

  • Disruption to Landscaping

During installation, digging and removing plants, soil, and other landscaping components may be necessary. This might disrupt the current landscape, and restoration and replanting can drive up the final price.

  • Regulatory Factors to Think About

Drainage systems and water runoff are subject to rules in some areas. The project’s complexity may increase if permits or specific regulations are needed to install a French drain.

  • Poor in Handling Heavy Flooding

While French drains are great for managing surface and underground water, they may need to be installed more frequently in areas with severe or regular flooding, which could require the use of additional drainage systems.

  • Possibility of Clogging

Debris, roots, or dirt can cause French drains to clog over time. This can compromise their functionality, necessitating frequent maintenance or, in extreme circumstances, reinstallation.

  • Risk of Wrong Installation

Improper French drain installation can worsen drainage issues, cause water to pool, and potentially damage structures. Precision in sloping, material selection and depth is essential, and experienced workers are needed.

  • Limited Lifespan

French drains can only last as long as the installation and maintenance are up to par. If a system fails within a few years, it may take more effort to replace or fix it if it isn’t well-built or maintained.

  • Soil Erosion

Water running down a French drain can cause soil erosion, undermine buildings, or damage the landscape if it is not controlled.

  • Maintenance on a Regular Basis 

Regular inspection and maintenance are essential for French drains to function properly. This process includes drainage inspections, clogging inspections, and debris removal.

  • Installation Cost and Labor

A French drain installation can be pricey if it requires skilled labor, extensive digging, and expensive materials (such as perforated pipes and gravel). The costs will go up as the project gets more intricate.

When deciding whether French drains are the best option for a drainage issue or specific setting, consider their advantages and drawbacks.

Conclusion

French drains are an effective and multipurpose solution to water management problems. They keep your property dry and safe from water damage.

Sand or Gravel - Which is Better for Drainage?

Sand or Gravel – Which is Better for Drainage?

By | Drainage Systems | No Comments

In many different contexts, sand and gravel help improve drainage. As a result, they are essential landscape and building materials. If you know what they are and how they work, you can choose them wisely for infrastructure, foundation work, and gardens.

Sand for drainage

Tiny mineral and rock particles form the fine aggregate known as sand. People commonly use it to improve soil drainage because it readily allows water to flow through. This helps prevent waterlogging and promotes healthy roots in landscapes and gardens. Adding sand to heavier soils, such as clay, can improve drainage and aeration by increasing porosity.

Gravel for drainage

Small stones and pebbles make up the bulk of gravel, a coarse aggregate. Its larger empty holes make it an excellent drain, allowing water to flow through faster. Drainage systems like retaining walls, dry wells, and French drains commonly use gravel to prevent water from pooling. It is also frequently used in buildings to strengthen their foundations and reduce their vulnerability to water damage.

Depending on the intended use and results, sand or gravel is more suitable for drainage. Consider these points:

Sand or gravel – which is better for drainage?

Gravel for Drainage

  • Stability

When it comes to structural support, gravel is superior because it is stable and won’t shift or compact with time.

Higher flow rates

Grit is great for high-volume drainage applications because water passes through it quickly because of the larger particle size.

  • Applications

Notable uses include backfilling around retaining walls and foundations, drainage trenches, and French drains.

  • Bigger spaces

Gravel facilitates quick water drainage by expanding the spaces between particles.

Sand for Drainage

  • Filtered drainage

By filtering out specific sediments and pollutants, the material can lessen the chance of downstream systems becoming clogged.

  • Finer Particles

Because its particles are smaller and there are fewer gaps between them, sand drains more slowly than gravel.

  • Compaction

Compaction is more likely to occur in sand, which could eventually limit drainage.

  • Applications

It is frequently used where water control and partial filtration are required, such as golf course bunkers, pavers, and septic system leach fields.

Making a choice between gravel and sand

  • Sediment control

Sand could work better than other materials for filtering sediment.

  • Water volume:

Gravel is usually the preferable choice when dealing with large volumes of water.

  • Support and location

Using gravel can improve drainage systems’ structural integrity near retaining walls or foundations.

Combined Strategy

For certain uses, a layered approach could be the way to go.

  • Top layer of sand

It helps prevent clogging while also providing some filtration.

  • Base layer of gravel

Offers both stability and quick drainage.

Should I use large or small rocks for drainage?

Whether or not your drainage system calls for rocks depends on its intended use and setting. To help you decide between big and small rocks, below is a general outline:

  • Gravel and small rocks

They are typically used as a top layer in areas that require more precise drainage. Although smaller rocks allow less room for water to move, they can help prevent soil from compacting. These are common when you need to level out a slope or keep larger boulders from becoming visible or dislodging.

Sand or Gravel - Which is Better for Drainage?

  • Large rocks

They are commonly utilized in a drainage system’s base layer to make room for water to flow. They are great for drainage because they allow water to drain through them easily without catching. This rock can be found at the base of retaining walls, dry wells, and French drains.

How to decide

Drainage Requirements

Larger boulders are typically preferred where high-capacity drainage is necessary, such as in a retaining wall or French drain.

Preventing Erosion and Leveling Surfaces

Gravel or smaller rocks are an excellent choice if preventing soil erosion or making a smooth surface is your primary focus.

Combination Strategy

The best approach may be to use a mix of the two for certain tasks. One method involves placing bigger rocks at the bottom to facilitate drainage and then covering them with smaller gravel or rocks to ensure stability and uniformity.

When strong drainage is required, big rocks are the way to go, while smaller rocks offer surface stability and greater control. For the best outcomes, consider using a combination strategy. If you still need to figure out how to address your unique problems, seek the advice of an expert in landscape drainage or design.

The best gravel for draining water around the house

Gravel’s superior drainage qualities make it a popular material and landscaping application. There are a few different kinds of gravel to think about when deciding how to direct water away from home:

  • Base Gravel

Base gravel, a mixture of crushed stones of varying sizes, provides a stable surface and high drainage properties. It’s a common material for pathways and driveways surrounding homes.

  • River Rock

River rock, similar to pea gravel but with bigger, smoother stones, is more rustic. It is not only aesthetically pleasing but also provides excellent water drainage.

  • Pea Gravel

Garden beds and drainage projects frequently use this smooth and rounded gravel. It adds aesthetic value to the landscape and facilitates water flow.

  • Crushed Stone

Crushed stone, a byproduct of rock quarrying, is widely used as driveway bases, French drains, and drainage ditches due to its high drainage capacity. Thanks to its angular edges, it compacts well, offers stability, and allows water to flow through.

For water drainage applications, consider building a drainage system, like a dry creek bed or a French drain, to manage water flow and avoid pooling around the foundation of your house. To prevent soil erosion and keep the drainage system in good working order, ensure the grading is correct and consider putting geotextile fabric underneath the gravel.

Choosing Between Sand and Gravel

Your project’s unique requirements will determine whether sand or gravel is better. Sand could be ideal for promoting plant growth and improving soil drainage. Gravel with larger particles provides more stability and better water flow for construction operations or heavy-duty drainage systems. In layered drainage systems, the two materials can complement one another for the best possible outcome.

How to Drain a Flat Yard with No Slope

How to Drain a Flat Yard with No Slope

By | Drainage Systems | No Comments

A yard that is completely flat and does not have any slope can be difficult to drain. This is because there is no natural water flow. There is a possibility that water will pool in certain areas. This might damage structures and plants, cause soil erosion, or cause flooding. The following is an introduction to techniques for efficiently draining a flat yard and handling this issue:

Why Drainage Matters

For a yard to stay healthy, good drainage is a must. Having too much water can lead to:

  • Infrastructure Damage

Buildings, bridges, and roads are all susceptible to water damage.

  • Soil Erosion

An excess of water could impact agriculture, land degradation, and soil erosion.

  • Pollution

Contaminants carried by floodwaters pose a threat to both ecosystems and water supplies.

  • Waterlogging

The soil becomes too wet, which stunts plant growth and destroys harvests.

  • Mold Growth

Mold and mildew thrive in damp environments and can become a health risk and a structural disaster if left unchecked.

  • Flooding

Water that is normally not present in an area overflows onto it, threatening life, property, and transportation.

Challenges in a Flat Yard

Damp soil, standing water, and other problems can result from poor drainage in flat yards. Some of the most typical difficulties are as follows:

  • Water puddling and pooling

Water pools can form ponds or puddles in places with inadequate drainage. This can damage the grass, plants, and even the foundation of the house.

  • Lawn and plant health risks

Overwatering a flat yard can lead to unhealthy gardens and lawns. It promotes fungal infections, increases weed growth, and rots plant roots.

  • Limited drainage options

It may be difficult to redirect water in a flat yard using traditional drainage techniques such as gravity-based systems or natural slopes.

  • Compacted soil

Car parking or heavy foot traffic can worsen the problem of compacted soil in flat yards. Soil compaction worsens drainage, which in turn increases the likelihood of flooding and pooling.

  • Poor water runoff

Runoff is minimal because there is no gradient for water to follow in a level yard. However, water may collect in some spots, making soil erosion and flooding more likely.

Here are some effective methods to improve drainage in a flat yard:

  1. Install a French drain.

We dig a French drain with rock or gravel and equip it with a perforated pipe. Follow these steps to set one up:

  • Planning the layout

You need to determine where the water pools so you can divert them. Sketch the French drain that will drain water away from a potentially dangerous area.

  • Excavate the trench

The trench’s optimal width and depth are 12 to 18 and 18 to 24 inches. A small slope of approximately one inch for every eight feet might also be helpful in directing water flow.

  • Add pipe and gravel

Before placing the perforated pipe in the trench, ensure the holes face down. Then, use more gravel to cover it. To keep dirt from getting into the pipe, lay landscape fabric over the gravel, then use mulch or grass to fill in the gaps.

Here are some key benefits of installing a French drain:

  • Prevents basement mold and mildew

Mold and mildew can flourish in basements with an abundance of moisture. French drains decrease the likelihood of such issues by keeping basements dry and free of moisture.

  • Minimizes soil erosion

French drains keep your yard’s soil from washing away and damaging your landscaping by diverting water away from vulnerable spots.

  • Improves usability of the yard

If you want to make better use of your yard and avoid problems caused by standing water and dirt, a well-installed French drain can help.

  • Mitigates flooding

They can divert floodwaters away from low-lying regions and toward storm drains or other approved drainage sites in the event of a strong downpour or flood.

  • Protects landscaping

French drains are a great way to keep your garden beds and plants healthy by managing the flow of water and avoiding problems like waterlogging and overwatering.

  • Prevents water damage

When you install French drains around your home’s foundation, water won’t be able to pool there and ruin your crawl space or basement.

  1. Create a dry well.

One way to collect water and let it slowly seep into the ground is to use a dry well, an underground structure.

  • Choose a location

Locate it somewhere low in the yard, far from any buildings.

  • Dig a hole

To accommodate the usual volume of water to be collected, a minimum of three to four feet in width and depth is required.

  • Fill with gravel

Fill the hole with crushed stone or gravel, then cover it with garden cloth to prevent dirt from sticking.

Here are some key advantages to installing a dry well:

  • Affordable

Dry wells are a cost-effective method for stormwater management. Compared to sophisticated drainage systems, they are straightforward to install and maintain.

  • Enhanced drainage

In order to increase drainage and avoid soil erosion or landscape damage due to standing water, dry wells are a great option. They provide a specific place for water to seep into the earth.

  • Eco-friendly solution

Dry wells are an eco-friendly way to manage stormwater. Runoff can potentially reduce the amount of dirt and debris washed downhill. This makes it easier for purer water to seep underground.

  • Preventing erosion

Dry wells can mitigate gullies, soil erosion, and other unwanted landscape changes by regulating the flow by allowing water to seep into the ground.

  • Infrastructure protection:

Managing stormwater runoff with a dry well helps protect your property’s foundation, sidewalks, driveways, and other infrastructure from water damage.

  • Decreased water pooling and flooding

When driveways, rooftops, and other surfaces have too much drainage, dry wells can help channel it underground. In particular, this will help keep water from collecting and localized flooding in low-lying parts of your property.

  • Decreased sewer system pressure

Decrease the quantity of stormwater running into sewage systems in urban and suburban areas to prevent them from becoming overwhelmed. During heavy rain, this can help reduce the likelihood of sewage overflows.

How to Drain a Flat Yard with No Slope

  1. Build a Swale

A swale is a man-made waterway that is shallow and slopes downward to redirect water.

  • Plan the swale

Draw a trail in the direction you wish the water to go.

  • Shape the swale

Dig a shallow, sloping trench to redirect water away from trouble spots.

  • Add rocks and plants

Adding beautiful pebbles or planting grass or other vegetation along the swale can increase aesthetics and stability.

Here are some key benefits:

  • Reduced runoff to municipal systems:

Swales alleviate infrastructure strain and the possibility of sewage backups or overflows. Swales installed on a flat yard can decrease the amount of stormwater runoff that enters municipal drainage systems.

  • Groundwater recharge

Swales can help recharge groundwater supplies by reducing the rate of rainwater runoff and increasing its infiltration into the soil. This aids in keeping the water table stable, which is good news for well water levels.

  • Improved water quality

Swales capture debris, sediments, and pollutants in stormwater, acting as a natural filter. As a result of this filtration process, the water that makes it into rivers, streams, or recharges underground is of higher quality.

  • Erosion prevention

Strong rains or an excess of water can erode even flat ground. Swales can help with this by slowing down water flow and acting as a natural barrier to catch and hold onto sediments.

  • Stormwater management

Areas with flat terrain are less likely to experience flooding when you use swales to collect, channel, and slow down stormwater runoff. They are an eco-friendly solution to the problem of surface water gathering due to heavy rains.

  1. Install a rain garden.

In addition to serving as a home for flora and fauna, rain gardens are engineered to collect and purify runoff.

  • Select a location

Find a shadier spot in the yard where the water runs down the ground.

  • Create a depressed area

Create a shallow bowl with sloping sides, approximately 6 to 12 inches deep.

  • Plant the right vegetation

Choose native shrubs, grasses, and plants that can withstand dry and rainy environments.

The benefits of installing a rain garden on flat land with no slope

  • Reduced Erosion

Rain gardens can stabilize soil and reduce minor erosion from runoff and heavy rainfall, which is less of a problem on flat ground.

  • Reduced pollution

Rain gardens serve as natural filters because they capture rainwater and let it seep into the soil and plants to collect more water. They assist in removing pollutants like sediments, grease, oil, and heavy metals that could otherwise contaminate rivers.

  • Water infiltration and reduced runoff

Reduced surface runoff is one benefit of rain gardens, which direct precipitation downward into the soil. In cities where impermeable surfaces are prevalent, this can be very helpful in preventing flooding.

Considerations

Things to think about while putting a drainage system into action are:

  • Maintenance

Maintaining and inspecting drainage systems on a regular basis is essential for their optimal operation.

  • Landscape Integration

Select drainage systems that complement the design of your landscape.

  • Environmental Impact

Never divert water to natural habitats or nearby properties.

  • Local regulations

Check the local construction codes to make sure your drainage solution is legal.

Conclusion

Draining a flat yard requires forethought and efficient methods. If you take the time to learn about its specific problems and explore your drainage choices, you can design your yard to be practical and well-drained.

Water-absorbing Plants and Flowers That Help with Drainage in Your Yard

Water-absorbing Plants and Flowers That Help with Drainage in Your Yard

By | Drainage Systems | No Comments

If your backyard has drainage problems or experiences excessive rainfall, water-absorbing plants and flowers can be a great asset. These plants’ special adaptations make them happy in damp environments and aid in water absorption. This, in turn, reduces the likelihood of standing water, erosion, and flooding. You can improve the water management of your yard and make it more visually appealing by including these plants in your landscape design.

What are water-absorbing plants and flowers?

Species that can absorb water and grow in moist conditions are referred to as “rain garden” or “water-wise” plants. In areas with poor drainage or heavy rain, the root systems of water-absorbing plants and flowers can soak up a lot of water.

Characteristics of Water-Absorbing Plants and Flowers

The ability to absorb and hold onto water is a defining trait of water-loving plants and flowers. Among these characteristics are:

  1. Effective Stomatal Control

To maximize water use, plants with excellent stomatal control can open and close their stomata quickly. To thrive in habitats with limited water supplies, adaptability is essential.

  1. Succulent Features

Certain plants, such as succulents and cacti, have thick, fleshy stems or leaves that act as water reservoirs. They are able to endure prolonged dry spells thanks to this adaptation. This allows them to retain moisture within themselves.

  1. Water Storage Structures

Rhizomes, tubers, and bulbs are structures that some plants use to store nutrients and water. These storage organs allow them to endure harsh environments.

  1. Decrease in Surface Area of the Leaf

In order to decrease water loss through transpiration, many water-absorbing plants and flowers have smaller leaves. For instance, some shrubs and grasses have leaves that are such that they resemble needles or are very thin.

  1. Leaf Orientation and Structure

In times of drought, plants that absorb a lot of water may have leaves that fold or curl inward. Additionally, you can arrange them to avoid excessive direct sunlight, thereby reducing evaporation.

  1. Drought-Deciduous Behavior

In order to conserve water, some plants lose their leaves when the weather gets dry. This strategy helps them survive in tough environments by preserving resources, which they can then use to regrow when things get better.

  1. Thick Outer Layer Back

A thick bark or outer covering may help water-absorbing plants and flowers withstand harsh weather and retain as much water as possible.

  1. Deep root systems

Extensive and deep root systems are common in water-absorbing plants and flowers. Because of this, they can draw less water from surface sources and instead draw from deeper soil moisture reserves.

  1. Surfaces that are hairy or waxy

Some plant parts, including the stems and leaves, have a waxy covering, whereas others have hairy surfaces. These changes reduce water loss by lowering transpiration and fortifying the organism against environmental stresses.

Here are some water-absorbing plants and flowers to consider.

You can improve the soil’s structure and reduce the likelihood of flooding and waterlogging by planting water-absorbing plants and flowers in your yard. To achieve this, you can benefit from the following water-absorbing plants and flowers:

  • Iris

These resilient plants are perfect for marshy or damp environments because of their ability to draw water up from the ground.

Water-absorbing Plants and Flowers That Help with Drainage in Your Yard

  • Meadowsweet

Meadowsweet is able to absorb water efficiently and flourish in damp settings.

  • Dogwood

In damp areas, dogwood shrubs are useful for soil management. This is because their deep taproots can absorb excess moisture.

  • Willows

Because of their extensive root systems, which can soak up water, these trees are ideal for directing runoff from expansive landscapes and yards.

  • Astilbe

This flowering plant, can thrive in wet soils and even help plants absorb more water.

  • Ferns

Maidenhair ferns and Boston ferns, among others, prefer damp environments and are excellent at drawing moisture up from the ground.

  • Rushes

Rushes are common in wetland areas, and they contain roots that hold the soil in place and soak up water as needed.

  • Cypress Trees

These trees thrive in damp environments and improve water drainage in low-lying places.

  • Daylilies

Because of their adaptability, daylilies are able to absorb water from a variety of sources and even survive in damper environments.

  • Hostas

Because of their adaptability and love of shade, these plants can survive in damp environments and even soak up rainwater.

  • Meadowsweet

Meadowsweet is able to absorb water efficiently and flourish in damp settings.

  • Cattails

These can soak up a lot of water, making them ideal for flooded and wet areas that need draining. You can find them in wetlands.

Benefits of Water-Absorbing Plants and Flowers

Landscaping techniques aimed at reducing water gathering and runoff can greatly benefit from the use of water-absorbing plants and flowers in backyard drainage management plans. The key benefits of using these plants include:

  1. Affordable Solutions

An eco-friendly and economical way to deal with drainage problems is to use water-absorbing plants and flowers. Because of this, you won’t need less expensive and more hassle-free artificial drainage systems.

  1. Decreased Soil Erosion

These water-absorbing plants’ root systems reduce soil erosion from water runoff. Because erosion is so common in rainy areas and on slopes, this is a lifesaver in those places.

  1. Increased Biodiversity

Your yard can become more ecologically diverse by adding water-absorbing plants and flowers. These plants and flowers can attract a wide range of species, including butterflies, bees, and birds. Pollination and other natural processes can also benefit from this.

  1. Natural Water Filtration

Plants that can soak up water can improve the quality of runoff and rainwater that seep into the ground and subsequently flow into nearby streams by filtering pollutants. This leads to a better environment with less pollution.

  1. Visual Appeal

There are a lot of lovely water-absorbing plants and flowers that can also add value to your property. They allow you to design a landscape that is visually appealing. This is because they come in a variety of colors, sizes, and shapes.

  1. Improved Drainage

The roots of water-absorbing plants and flowers can loosen tightly packed dirt, allowing water to seep in more easily. This can improve both the drainage in your backyard and the accumulation of surface water.

  1. Flood Mitigation

These plants can help keep your yard from flooding by soaking up any extra water that may run off. This is especially helpful in areas with a lot of rain or drainage issues.

Designing a Garden with Water-Absorbing Plants and Flowers

The following are some suggestions for designing a garden using water-absorbing plants and flowers:

In areas where managing water flow is an issue or where there is a tendency to excessive rainfall, it is a great idea to design a yard with water-absorbing plants and flowers. These gardens, as an attractive and low-maintenance landscape option, can reduce the amount of water that pools and runs off. A detailed plan for creating such a garden is presented here:

  1. Assess your site.
  • Soil Type

You need to know the type of soil you have and how well it drains. If you follow these guidelines, you should have no trouble selecting water-absorbing plants and flowers that thrive in your garden.

  • Sunlight

Find out how much sunshine your garden gets at different times of the day. This will help you decide which plants to put there.

  • Water flow

Pay attention to how the water moves around in your yard. In the event of a heavy downpour, locate the spots where water flows or pools.

  1. Select plants that absorb water

Think of plants that can usually handle damp conditions or soak up a lot of water.

  1. Plan the garden layout
  • Berms and swales

Make use berms, which are small elevated places, and swales, which are shallow ditches, to control the flow of water and channel it to absorbent regions.

  • Rain gardens:

Build a rain garden to collect and soak up water that runs off of driveways, rooftops, and other hard surfaces. Prepare a shallow pit and fill it with water-absorbing plants and flowers.

  • Walkways and paths

Planning pathways carefully to restrict foot movement can prevent soil compaction in damp regions.

  • Raised beds

If you want to build structure and improve drainage in some areas, you might want to think about utilizing raised beds.

  1. Install a water management system.
  • Drainage systems

To control overflow and prevent flooding, it may be necessary to set up drainage systems.

  • Rain barrels

Setting up rain barrels is one option for collecting rainwater for gardening.

  1. Incorporate decorative features
  • Mulching

Mulch helps conserve moisture and keeps weeds at bay.

  • Water Features

For both aesthetic and practical reasons, think about installing a fountain, stream, or small pond in your landscape.

You can create a lovely and practical water-management garden in your backyard by following these instructions and adding water-absorbing plants and flowers.

Conclusion

Think about the weather, the soil, and any other landscaping requirements in your area before deciding to use these plants to aid with drainage. These water-absorbing plants and flowers are an attractive and diverse addition to any yard. They also help prevent water from pooling.