Express Drainage Solutions

A Solution for Sanitation, Wastewater Treatment & Renewable Energy

Njengi House

2nd Floor Suite 6, Tom Mboya St.

8:00AM - 5:00PM

Monday to Friday

+254742781455

info@expresswatersolutions.com

Category

Drainage Systems

Road Drainage System

Road Drainage System

By | Drainage Systems | No Comments

For roads to last, be safe, and be usable, civil engineers must design them with drainage systems in mind. Road surfaces must have adequate drainage to avoid decreased traction, structural damage, and an increase in accidents due to water accumulation. A road drainage system’s primary function is to collect, transport, and dispose of surface and underground water from the road and its surroundings.

Importance of a Road Drainage System

A road drainage system is essential to keeping roads safe, long-lasting, and functional. Here are some key points about road drainage:

  1. Protecting the environment
  • Contaminant Management

Safeguarding local ecosystems from erosion and sedimentation, as well as decreasing the likelihood of flooding, are two primary functions of a well-designed road drainage system.

  • Controls Runoff

By reducing water damage, a proper road drainage system reduces the burden and expense of road maintenance and repairs.

  1. Economic advantages
  • Decreased Repair Costs

Repair costs will be lower in the long run if road damage is less common and less severe.

  • Improved Transportation Efficiency

Well-maintained roads provide efficient transportation by reducing delays and increasing economic productivity.

  1. Improves road safety
  • Prevents Freezing Conditions

With appropriate drainage, ice production on roadways in cold weather can be prevented. This helps to remove water quickly, reducing the risk of accidents.

  • Minimizes Hydroplaning

Well-drained roadways reduce the likelihood of hydroplaning, a condition in which a vehicle loses traction on the road due to water accumulation.

Road Drainage System

  1. Improving user comfort
  • Minimal Splashing

Water spray and splash, due to improper drainage, can make cyclists and pedestrians uncomfortable and impair drivers’ visibility.

  • Smooth Travel

When roads have adequate drainage, road users find it easier and more pleasant.

  1. Compliance with Regulations
  • Legal Requirements

The construction and maintenance of roads, as well as drainage systems, are governed by rules and regulations in many areas. To avoid legal issues and fines, you must strictly adhere to these requirements.

  1. Prevents road damage
  • Protecting the Pavements

To avoid structural damage, cracks, potholes, and other issues, proper drainage is essential. Water seeping into the pavement layers can cause these problems.

  • Controlling Erosion

By diverting runoff away from roadways, a well-designed drainage system prevents the likelihood of embankment and roadbed erosion.

  1. Increases road durability
  • Maintenance Cost Decrease

Proper drainage reduces water damage, lowering the burden and expense of road maintenance and repairs.

  • Structural damage prevention

Water accelerated the degradation of road materials. By avoiding structural damage due to water, an effective road drainage system prolongs the road’s lifespan.

The importance of properly draining roads cannot be overstated. Contributing to economic efficiency, preserving infrastructure, ensuring safety, and protecting the environment are all key aspects of road design and maintenance. The long-term viability of transportation networks depends on investments in appropriate road drainage systems.

Components of a Road Drainage System

A road drainage system’s proper management of both surface and underground water is critical to ensuring the longevity of road infrastructure. A road drainage system primarily comprises the following components:

  1. Surface Drainage:
  • Catch Basins

The system transfers surface water to underground drainage systems via ditches and pipes.

  • Side Ditches

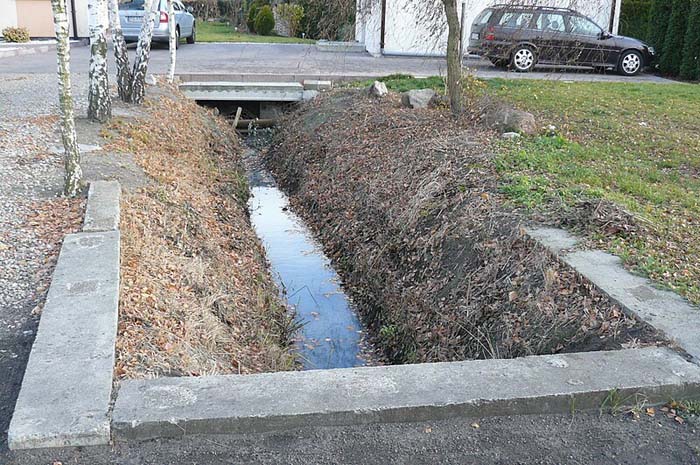
Drains in roadside ditches collect and transfer runoff.

  • Drainage Inlets/Grates

The underground drainage system has entry points.

  • Gutters and Curbs

The drainage system receives runoff from the road.

  • Roadway Cross Slope

It ensures that water drains away from the road surface and down the sides.

  1. Subsurface Drainage:
  • Longitudinal Drains

Water is collected and directed away by pipes from underdrains that run parallel to the road.

  • Drainage Layers

Various layers of porous materials are placed under the road to allow water to flow to the underdrains.

  • Underdrains

To collect and transport groundwater, perforated pipes are laid beneath the road surface.

  1. Conveyance Systems:
  • Culverts

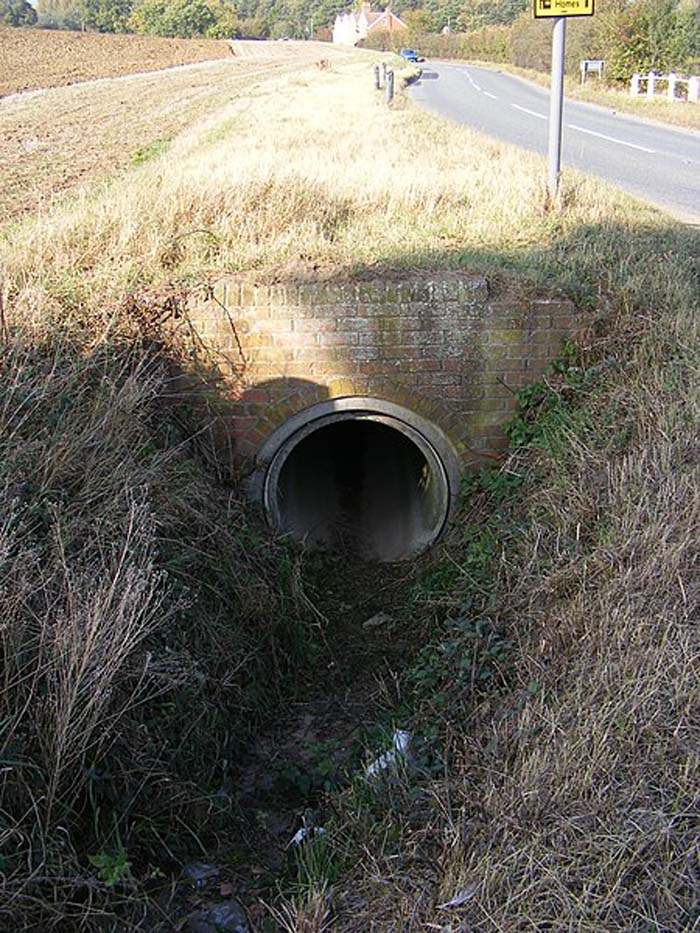
In places where roads meet natural streams, there are structures that let water flow under the road.

  • Storm Sewers

Water is conveyed to an appropriate outlet via underground pipes.

  1. Outfall and Disposal Systems:
  • Outfall Channels

Channels transport water from urban areas into natural waterways.

  • Retention/Detention Ponds

To minimize peak discharge rates, temporarily store runoff.

  • Outfall Structures

This is the point at which the runoff from the drainage system enters waterways such as streams and rivers.

  1. Sediment and Erosion Control:
  • Silt Fences

Makeshift dams to keep dirt and debris from flowing away from building sites.

  • Riprap

At discharge sites, rocks or other erosion-prevention measures are installed.

  1. Additional Components:
  • Manholes

They assist in inspecting and repairing the entryways to underground drainage systems.

  • Swales

In order to slow down and filter surface runoff, shallow channels are constructed.

Minimizing water damage to the road structure, preventing flooding, and preventing water accumulation on road surfaces are all goals of an effective road drainage system. The road network’s long-term durability and safety depend on these components being designed, built, and maintained properly.

Design Considerations

Road Use

In order to endure the continual wear and tear, roadways with heavy traffic need drainage systems that are more resilient.

Climate

To manage massive amounts of water, areas with high snowfall or rainfall require more comprehensive drainage systems.

Soil Type

How well various soils drain depends on the type of soil. Soils that are clayey, as opposed to sandy, need a drainage system that is more effective.

Topography

Drainage systems are influenced by the surrounding environment. To handle rapid water flow, more durable systems are needed on steeper terrains.

Conclusion

For roads to be functional, long-lasting, and safe, their drainage systems must be carefully planned. It makes use of both above- and below-ground components to control water flow and avoid harm. A road drainage system designed by engineers can mitigate the negative impacts of water collection on roadways and their users by taking into account variables including road use, soil type, topography, and climate.

Factors to Consider when Designing a Drainage System

Factors to Consider when Designing a Drainage System

By | Drainage Systems | No Comments

Drainage system design is an essential part of city planning and civil engineering. The primary goal is to control surface water levels so that waterlogging, soil erosion, and flooding are not possible. Industries, residential areas, roads, and agricultural lands can all benefit from a well-planned drainage system that efficiently removes overflow water. This, in turn, protects infrastructure and keeps people safe.

Principles of Drainage System Design

  1. Hydrological Analysis

In order to properly size drainage components, it is crucial to have a thorough grasp of peak flow rates, overflow constants, and rainfall patterns.

  1. Hydraulic Design

Ensure that there is enough water flow capacity to prevent surcharges and flooding in channels, pipes, and other structures.

  1. Ecological Considerations

Making designs that are gentler on ecosystems and natural sources of water. This covers rain gardens, permeable pavements, and green roofs—a sort of sustainable drainage system.

  1. Regulatory Compliance

This means following all applicable local, provincial, and national standards and regulations, which may specify particular requirements for design, building, and maintenance.

  1. Maintenance and Sustainability

Ensuring long-term functionality and sustainability through the design of systems that are easy to use and maintain.

Key Components of a Drainage System

In order to control the flow of water, avoid flooding, and keep both urban and rural areas clean, a drainage system is necessary. The following are essential parts of any drainage system:

  1. Surface drains
  • Catch Basins/Inlets

Runoff is collected and directed into the drainage system.

  • Channels and Gutters

They collect water that runs off of surfaces such as rooftops, roads, and more.

  • Grates

To prevent debris from entering the system, cover any openings.

  1. Subsurface Drains
  • French Drains

To redirect water away from buildings, use perforated pipes, as well as gravel-filled pits to contain the water.

  • Drain Tiles

This product is ideal for use in agricultural fields that have an excess of water.

  • Perforated Pipes

These enable water to seep in and run underground.

  1. Storm Drains
  • Outfalls

Stormwater discharge points into natural bodies of water.

  • Stormwater Pipes

Pipes with a large diameter transport water from catch basins to areas where it is discharged.

  •  Manholes

Ensure that maintenance and inspection access points are set up.

  1. Sewers
  • Combined Sewers

Although sewage and stormwater are less prevalent due to the danger of overflow, they both need to be carried.

  • Sanitary Sewers

These get sewage out of buildings and into treatment plants.

  1. Swales and Ditches
  • Open Channel

To prevent erosion, direct water along vegetated fields or roadsides.

  • Swale:

Greenways that are both shallow and planted help to reduce runoff and increase infiltration.

  1. Retention and Detention Basins
  • Detention Basins

In order to manage discharge rates and prevent floods, put a temporary stop to runoff.

  • Retention Ponds

These are large, permanent bodies of water that help with flood control and stormwater management.

  1. Lift Stations and Pumps
  • Lift Stations

In order to facilitate gravity flow to discharge points or treatment facilities, either wastewater or stormwater should be raised to higher altitudes.

  • Pumps

Transfer water from lower to higher levels; this is particularly important in low-lying or flat regions.

  1. Control Structures
  • Gates and Valves

Manage the flow and direction of water in channels and pipes.

  • Weirs and Dams

Keep basins and channels from overflowing.

  1. Green Infrastructure
  • Permeable Pavements

These reduce runoff by allowing water to travel across surfaces.

  • Green Roofs

Vegetation systems on roofs are capable of absorbing rainwater.

  • Rain Garden

The use of landscaped areas that are able to collect and absorb runoff.

  1. Systems for Monitoring and Maintaining
  • Sensors

These are used to monitor the water level and flow velocity.

  • Maintenance Access Points

Make sure the system is easily accessible for routine inspection and cleaning.

All of these components work together in a well-designed drainage system to keep water from overflowing and to maintain high water quality.

Factors to Consider when Designing a Drainage System

Factors to Consider when Designing a Drainage System

Several elements must be carefully considered during the design phase of a drainage system. This will help to guarantee its longevity, functionality, and low environmental influence. Listed below are a few important considerations:

  1. Materials
  • Ecological Impact

When you can, choose eco-friendly materials.

  • Cost

Strike a balance between the upfront expense and the ongoing maintenance.

  • Durability

Choose materials that are resilient enough to endure the weather where you live.

  1. Emergency Preparedness
  • Redundancy

Incorporating overflow paths or backup systems will prepare you for the unexpected.

  • Flood Management

Planned to withstand possible flooding and other severe weather conditions.

  1. Hydrology
  • Drainage Area

The catchment area that contributes to runoff should be defined.

  • Peak Flow Rates

Find out the highest possible flow rates that are anticipated during storms.

  • Runoff Calculation

Determine an approximate amount of water that needs to be controlled.

  1. Economic Factors
  • Life Cycle Costs

Take into account not only the upfront price but also the ongoing maintenance costs.

  • Budget

Make sure the system is effective while staying within the budget.

  1. Standards and Regulations
  • Ecological Protection

Take measures to ensure compliance with laws protecting the environment.

  • Local Codes

Follow all applicable local, regional, and national guidelines and regulations.

  1. Accessibility and Maintenance
  • Longevity

Make sure the system lasts a long time with little maintenance.

  • Ease of Maintenance

Make sure that systems can be easily accessed for repairs and maintenance.

  1. Safety
  • Structural Integrity

Check the stability and soundness of each part.

  • Public Safety

Create systems that are safe for everyone to use.

  1. Environmental considerations
  • Ecological Impact

Keep local wildlife and ecosystems as undisturbed as possible.

  • Water Quality

Introduce measures to improve the purity of the released water.

  • Erosion Control

Put measures in place to stop soil erosion.

  1. Integration with Other Infrastructure
  • Urban Planning

Coordinate the drainage system with the larger goals of city planning.

  • Utility Coordination:

Verify that it will work with both current and future utilities.

  1. Site analysis
  • Vegetation

The existing vegetation affects both water absorption and erosion control.

  • Climate

Think about your area’s rain frequency, intensity, and patterns.

  • Soil Type

Evaluate the soil’s capacity to retain and release water by measuring its permeability.

  •  Topography

Learn about the natural water flow by studying the slope and elevation of the terrain.

  1. Design elements
  • Retention/Detention Basins

Use these to control the amount and quality of water.

  • Outfalls:

Make sure that the outfalls are properly designed to dispose of water into sewers or natural bodies of water.

  • Conduits and Pipes

To accommodate anticipated flows, select pipe materials and sizes accordingly.

  • Catch Basins and Inlets

Think about where and how much water can be collected from the surface.

Designers and engineers may build resilient drainage systems that regulate water flow efficiently and sustainably, protecting the environment and people.

Steps in Designing a Drainage System

  1. Site Assessment
  • Surveys can help us better understand existing drainage conditions, soil characteristics, and topography.
  1. Planning and designing
  • Making predictions about the system’s performance under different conditions using simulation and modeling tools on a computer.
  •  Drawing up comprehensive plans and specifications for drainage components, including their specifications, sizes, and designs.
  1. Construction
  • Excavation, pipe and structural installation, and final inspection for alignment and connections as part of the design implementation process.
  1. Inspection and Testing
  • Ensuring that everything is running smoothly and that the drainage system is constructed as specified.
  1. Operations and Maintenance:
  • Coming up with a maintenance schedule that incorporates routine checks, repairs, and cleaning to forestall clogs and other problems.

Conclusion

Engineers need experts in environmental science, hydraulics, and hydrology to plan efficient drainage systems. Engineers may develop systems that better manage water, safeguard infrastructure, and improve the quality of both urban and rural areas by combining these concepts with regulatory requirements and practical considerations.

Pros and Cons of Liquid Drain Cleaners

Pros and Cons of Liquid Drain Cleaners

By | Drainage Systems | No Comments

Liquid drain cleaners are powerful chemical solutions that help dissolve and break down blockages in pipes and drains. Usually made of powerful acids and alkalis, like sulfuric acid or sodium hydroxide, they react with grease, hair, organic matter, and other things that clog drains.

When using liquid drain cleaners, precisely follow all safety measures and the manufacturer’s instructions. In the wrong hands, these chemicals can cause serious harm and corrosion. It is best to use these products with safety gear, such as gloves and goggles, to ensure enough air circulation.

Liquid drain cleaners work well for small blockages but might not be the best choice for larger or more persistent problems. Plumber’s snakes and plungers are examples of mechanical procedures that may be more appropriate in certain situations. Also, liquid drain cleaners can corrode pipes with prolonged usage. For this reason, be careful and look into other ways to keep your plumbing system in good repair.

Here are the pros and cons of liquid drain cleaners.

Pros:

  • Accessibility

They are able to access tight spaces in the drain pipes and remove obstructions that would be impossible to reach by hand.

  • Cost

If you’re on a tight budget, consider using a liquid drain cleaner instead of hiring a plumber to unclog your drain.

  • Effectiveness

Liquid drain cleaners can quickly and easily remove clogged drains. They can dissolve or break down hair, grease, organic matter, and other obstruction-causing substances.

  • Convenience:

Liquid drain cleaners are available at any store and are really simple to use. Once the solution has had time to work, you can flush it down the toilet by pouring more water down the drain.

Cons:

  • Chemical Hazards

Liquid drain cleaners typically have strong chemicals like sodium hydroxide or sulfuric acid, which can cause harm if they get into the eyes, skin, or food. Using them in places with inadequate ventilation is not a good idea since they can release toxic fumes.

  • Effects on the Environment 

If not disposed of correctly, the chemicals in liquid drain cleaners can cause harm to the environment. They pose a threat to aquatic life and can contaminate water sources.

  • Potential Damage to Pipes

Older or more delicate pipes constructed of materials such as metal or PVC are more susceptible to corrosion and damage by drain cleaners, especially ones containing sulfuric acid.
Pros and Cons of Liquid Drain Cleaners

  • Incomplete Clearing

Liquid drain cleaners work well for small obstructions but may fail to remove larger ones or those made of non-biodegradable materials, such as foreign objects or tree roots stuck in the pipes.

  • Safety Concerns

If handled incorrectly, liquid drain cleaners can potentially be dangerous. Accidents or injuries could result from combining different kinds of drain cleaners or not following the directions precisely.

Frequently Asked Questions

Does Coke help unclog drains?

A famous household hack involves using Coca-Cola to clear drains, although the usefulness of this method is up for discussion. The carbonic and phosphoric acids in Coca-Cola may dissolve organic blockages, among other things. Coca-Cola does contain some acids, but less than commercial drain cleaners. Furthermore, carbonation could aid in particle displacement.

Pouring Coke down the drain might work for little clogs, but you’re better off with a drain cleaner for larger ones. You should contact a professional plumber or utilize liquid drain cleaners designed for stubborn blockages.

Does vinegar unclog drains?

When mixed with baking soda, vinegar can help unclog drains to a certain degree. The acidic vinegar and basic baking soda react chemically to form bubbles, which may aid in the removal of small blockages. However, more serious obstructions may be too much for this approach. If the blockage is stubborn, you might have to hire a plumber or buy a commercial drain cleaner.

Can Bleach Clear a Clogged Drain?

Although most people advise against using bleach to unclog drains, it works wonders for cleaning and deodorizing surfaces. Clogged things like soap scum, grease, or hair are resistant to bleach’s dissolving capabilities.

Using a drain cleaner that dissolves these substances would be more appropriate. Chemical liquid drain cleaners commonly serve this purpose, such as sulfuric acid or sodium hydroxide. Be careful not to spill or otherwise damage these products; they are corrosive.

If that doesn’t work, use a drain snake or plunger to remove the obstruction mechanically. These tools restore the free flow of water by physically removing the obstruction.

To avoid harming your plumbing system, it is critical to seek the advice of a professional plumber if you are still deciding on the appropriate strategy or if the blockage continues regardless of your attempts.

Can you pour boiling water down the drain?

Pour boiling water down the drain to effectively clear minor clogs caused by soap or grease accumulation. However, the intense heat could damage PVC or older pipes, so it’s important to be careful. Furthermore, it is advisable to seek the advice of a professional plumber to prevent any additional damage if you anticipate a more serious blockage or have any worries regarding your plumbing system.

How do you unblock a drain naturally?

You can make a natural drain unclogger by mixing vinegar and baking soda in equal parts and then adding hot water. This is the way to accomplish it:

  • First, flush the drain with approximately half a cup of baking soda.
  • Add half a cup of vinegar to the baking soda. Fizzing is common, indicating that the reaction effectively breaks down debris.
  • For easier clogs, let the mixture sit for half an hour; for more stubborn ones, leave it overnight.
  • To remove the loose particles, pour boiling water down the drain once the waiting time is up.

This technique may work for mild-to-moderate blockages. If the obstruction is really difficult to remove, you may have to try again or resort to more mechanical means, such as a plumber’s snake. Be careful around boiling water, and don’t use this procedure again if you’ve just used a commercial drain cleaner—the two chemicals together are dangerous.

Conclusion

When considering liquid drain cleaners, it is important to consider the potential benefits and drawbacks. Sometimes, it is safer and more effective to call a professional plumber.

How Liquid Drain Cleaner Works

How Liquid Drain Cleaner Works

By | Drainage Systems | No Comments

Liquid drain cleaners can unclog commercial, industrial, and residential pipes and drains. These are usually strong chemical solutions. Commonly used in liquid form, these cleaners help to dissolve a wide range of organic pollutants that might clog plumbing systems, including soap scum, grease, hair, and more organic materials.

When used as directed, liquid drain cleaners dissolve and dismantle blockages in pipes, restoring the free flow of water. They incorporate powerful acidic or alkaline ingredients like sulfuric acid or sodium hydroxide, which combine with the substances causing blockage. This process breaks down the blockage-causing substances into smaller particles, making them easier to wash away.

Liquid drain cleaners can be used if you have mild to moderate blockage in your toilets, bathtubs, and sinks. You pour the solution down the drain, let it sit for a while, and then flush it away with water. It’s that simple to use.

Because of their acidic and sometimes dangerous properties, liquid drain cleaners should be used cautiously and according to the manufacturer’s directions. Improper use can risk fixtures, pipes, and users’ health.

Here’s how Liquid Drain Cleaner works:

Liquid drain cleaners commonly use chemical reactions to remove clogs and clean drains. A more basic breakdown of how they function is as follows:

  • Keeping Clogging at Bay

Some liquid drain cleaners use chemicals that coat the inside of the pipes to prevent further blockages caused by debris buildup.

  • Chemical Reaction

When you pour the liquid drain cleaner into the drain, the blockage-causing material reacts with it into the drain. The chemical reaction produces heat, which aids in dissolving or melting the blockage.

  • Unclogging the drain 

When the obstruction dissolves, the drain becomes unclogged, restoring the water flow. It is common to use water to flush the dissolved debris out of the drain, allowing it to flow freely.

  • Dissolving the Clog

The drain cleaner’s chemical ingredients dissolve the blockage into smaller, more manageable pieces. This makes it easier to loosen the obstruction and flush it away with water.

  • Chemical Ingredients

Acids like sulfuric acid and strong alkalis like sodium hydroxide are typical chemical components of liquid drain cleaners. Because of their strong reactivity, these chemicals can dissolve organic materials that contribute to blockages, such as food particles, grease, hair, and soap scum.

The best liquid drain cleaners to unblock clogged drainage

  1. Drano Max Gel Drain Clog Remover and Cleaner

One well-liked solution for cleaning pipes and unclogging drains is the Drano Max Gel Drain Clog Remover and Cleaner. The thick gel mixture effectively dissolves stubborn blockages that develop in pipes. This is due to the gradual accumulation of soap scum, hair, and other debris. It is usual to pour it down the drain, let it sit for a while to do its job, and then flush it away with hot water. Because it includes powerful chemicals, you must use it properly and adhere to all safety protocols to avoid injury.

Pros:

  • Versatile

Because of its adaptability, it can solve a wide range of typical plumbing problems in the home, including those in showers, tubs, and sinks.

  • Reasonably Priced

Because Drano Max Gel is less expensive, it is an affordable alternative to hiring a plumber for small drain problems.

  • User-friendly

Because of its thick gel consistency, it is easy to pour down the drain and doesn’t require much effort to apply.

  • Prompt Effect 

It usually works in 15 to 30 minutes for small clogs, so it’s a short-term solution.

  • Widely Available

Most online sellers and supermarkets conveniently carry Drano Max Gel, making it easily accessible whenever needed.

  • Effective

Drains can easily clog with grease, soap scum, hair, and other common debris; Drano Max Gel helps to dissolve these and other stubborn obstructions.

  • Preventative Maintenance

Consistent use keeps pipes clean and unclogged, which helps avoid future blockages.

Cons:

  • Limited Effectiveness

Alternative methods or professional assistance may be necessary if it fails to effectively clear blockages of particular materials, such as plastic pipes or solidified ones.

  • Effects on the Environment 

Drano Max Gel contains substances that, if discarded incorrectly, could cause environmental harm. When used improperly or in excess, they can also cause pipe damage.

  • Worries about Safety 

The strong chemicals in Drano Max Gel pose a threat if not handled properly. Safety measures, such as wearing protective gear like goggles and gloves and keeping them away from kids and pets, are critical.

How Liquid Drain Cleaner Works

  • Pipes at Risk of Damage

Most plumbing systems can safely use Drano Max Gel, but using it too often or long could damage your pipes.

  • Chemical Smell

Some people might find the product’s strong chemical smell irritating and unpleasant.

  1. Green Gobbler Liquid Hair Drain Clog Remover and Cleaner

This liquid drain cleaner easily unclogs drains clogged with hair, grease, soap scum, and other debris. Its formulation, which dissolves these items swiftly and efficiently, makes restoring proper drainage in sinks, tubs, showers, and other plumbing fixtures easier.

One of its key selling points is its non-corrosive, septic-system, and pipe-safe formulation. In many cases, it employs a combination of powerful enzymes and other all-natural substances to loosen obstructions, making it easy to flush them away with water.

Apply the appropriate dosage of Green Gobbler to the affected drain, let it sit for the designated period (usually 30 minutes to an hour), and then flush it out with hot water. According to many users, it eliminates the need for heavy human labor and harsh chemicals and successfully clears even the most stubborn blockages.

Pros: 

  • Versatile

It works in a wide variety of plumbing fixtures, including those found in toilets, kitchens, and bathrooms.

  • No damage to the plumbing or septic tanks

You won’t have to worry about expensive plumbing repairs. This is due to the non-corrosive formula’s ability to avoid damaging septic tanks or pipes.

  • Eco-friendly formula

This one is better for the environment than drain cleaners containing harmful chemicals. The construction materials used are non-toxic and biodegradable.

  • User-friendly 

Just pour the suggested amount down the drain, let it sit for a bit, and then flush with hot water to finish. Simplified methods and equipment are sufficient.

  • Resolves hair blockages effectively 

Hair is a typical source of clogged drains in tubs, showers, and sinks. However, many users have found that Green Gobbler easily clears hair jams.

Cons:

  • Cost

Since it may be necessary to apply it more than once to remove really hard clogs, the price tag could be higher than that of competing drain cleaners.

  • Powerful smell

Some customers have complained that working with Green Gobbler in places with insufficient ventilation is uncomfortable due to the product’s strong chemical odor.

  • Not suitable for all clog types

Green Gobbler works well for organic material and hair clogs but may not be effective for solid objects or mineral buildup blockages.

  • Irritate the eyes and skin

If not used correctly, this chemical cleaner can irritate the skin and eyes. Always wear protective gear, such as gloves, and keep the product away from your eyes and skin.

  • It may be necessary to use several applications

Although it works for most people, some clogs are difficult to remove and may necessitate more than one application or mechanical procedure, such as snaking or plunging.

  1. Drano Max Build-Up Remover Drain Cleaner

For those times when other drain cleaners have failed, try the Drano Max Build-Up Remover Drain Cleaner. Its special composition breaks down the buildup of soap scum, hair, and other debris in pipes. This buildup can lead to clogged drains or poor drainage over time. It is common practice to pour Max Build-Up Remover down the drain, wait the recommended period, and then flush the system with hot water. To be sure it works and stays that way, read the directions thoroughly. When cleaning this chemical drain, use protective gear, like gloves and goggles. If the blockage continues or you are worried about the safety of chemical cleaners, it is best to call a plumber.

Pros:

  • Preventative maintenance

By keeping drains free of buildup, this product can aid in preventing future clogs.

  • Very effective 

Drano Max typically clears clogs quickly and restores proper drainage, saving time and effort.

  • Very user-friendly

With its convenient liquid form, you can easily pour this product down the drain for effortless application.

  • With a tough buildup, it works wonders

For stubborn blockages and accumulations in drains, such as soap scum, hair, and other organic substances, try Drano Max Build-Up Remover.

Cons:

  • Potential for damage

Powerful liquid drain cleaners like Drano Max Build-Up Remover can damage pipes if they are handled improperly or exposed to specific substances for an extended period of time.

  • Effects on the environment

If not disposed of correctly, the chemicals in liquid drain cleaners might harm the environment. Take care when using and disposing of the product.

  • Not ideal for all kinds of pipes

Some pipes, particularly older or more sensitive ones, may not be able to withstand the powerful ingredients used in this cleaning. Before using, make sure you read the manufacturer’s instructions carefully.

  • Harsh chemicals

In the wrong hands, the powerful chemicals in Drano Max Build-Up Remover—like those in other drain cleaners—can cause serious injury. Use it with caution and pay attention to safety instructions.

  1. Green Gobbler Enzyme Drain Cleaner

Green Gobbler Enzyme Drain Cleaner, a well-liked product, is known for its environmentally conscious method of unclogging drains. Blockages in drains can be due to organic materials like food particles, hair, grease, and soap scum. This product uses natural enzymes to break down these substances. This enzymatic activity is typically kinder to pipes and the environment than conventional drain cleaners. This is because it dissolves the blockage without using harsh chemicals. It’s available in powder and liquid forms, among others, to address a wide range of plumbing issues. Its biodegradability and widespread praise for its efficacy have made it a popular option among eco-conscious homeowners seeking an alternative to harsh chemical liquid drain cleaners.

How Liquid Drain Cleaner Works

Pros:

  • Effective

A lot of people have found that Green Gobbler works great to unclog drains clogged with ordinary household items, including food particles, hair, soap scum, and grease.

  • Versatile

Users can choose the most appropriate Green Gobbler in several sizes and formulations for their drain cleaning needs.

  • Will not damage pipes 

Most people believe Green Gobbler is safe for PVC and metal pipes, unlike other chemical liquid drain cleaners.

  • User-friendly

To use Green Gobbler, you usually need to pour the recommended amount down the drain and wait for it to work.

  • Eco-friendly

One of Green Gobbler’s main selling points is that it dissolves obstructions using natural enzymes rather than harmful chemicals in its formulation.

Cons:

  • Powerful smell

For some, the pungent odor of Green Gobbler makes it an unpleasant liquid drain cleaner to use.

  • Not appropriate for all blockages

Green Gobbler works well on organic matter, but it may not work well when faced with mineral deposits or other obstructions.

  • Packaging

Several users have noted problems with the packaging, including difficulty opening the container and leaks.

  • Cost

Numerous customers have said that Green Gobbler’s eco-friendly features make up for the product’s higher price than conventional chemical drain cleaners.

  • It may take time

When dealing with really difficult or long-lasting clogs, you may need to use a chemical drain cleaner in addition to Green Gobbler.

  1. CLR Clear Pipes & Drains Clog Remover and Cleaner

This liquid drain cleaner removes and cleans deposits and obstructions from drains and pipes. Its formula targets typical organic material blockers such as soap scum, oil, hair, etc. This is a safe product for PVC and metal pipes.

Following the directions on the bottle, pour this liquid drain cleaner directly into the drain. It dissolves the blockage upon penetration, making it easy to flush away with water. Some materials are caustic and may necessitate protective gear like goggles and gloves while you work with them. Therefore, be sure to read and follow all manufacturer safety precautions.

Never combine this liquid drain cleaner with other chemicals, as doing so might release toxic fumes. Adequate ventilation is essential while using any cleaning solution. If you are still determining whether this product suits your plumbing requirements, seek the manufacturer’s or a plumber’s advice.

Pros:

  • Preventative maintenance

To ensure drains are buildup-free and prevent future blockages, use CLR Clear Pipes & Drains on a regular basis.

  • User-friendly

Because most formulas are liquid, they are easy to apply. You need to pour the formula down the toilet.

  • Versatile

It is compatible with various plumbing fixtures, such as tubs, bathroom sinks, kitchen sinks, and showers.

  • Acts quickly

It usually removes blockages and restores normal drainage in a short period of time.

  • Efficient in clearing blockages 

CLR Clear Pipes & Drains is able to dissolve and break down common blockage elements, including soap scum, grease, hair, and other organic substances.

Cons:

  • Limited efficiency

CLR Clear Pipes & Drains can help unclog most clogs. However, you may need to take extra precautions or call an expert for particularly difficult or stubborn ones.

  • Effect on the ecosystem

Improper disposal or leaching of the chemicals used in drain cleaners can harm the environment.

  • Harsh chemicals

Many chemicals used to make this liquid drain cleaner are powerful and dangerous if not used correctly. Additionally, they can potentially harm specific pipe types.

  • Possible health risks

It is critical to take safety measures and wear protective clothing when working with the product. It is toxic when touched directly or inhaled in fumes.

  • Chemical odor

Particularly in places with insufficient air circulation, the chemical smell of this liquid drain cleaner could be too much for some people to bear.

Conclusion

Liquid drain cleaners are quick and efficient, but you should only use them sparingly and as a last resort after you’ve tried more traditional methods like snaking or plunging. The safe and successful use of these products also depends on regular maintenance and the proper disposal of chemical residues.
Common Reasons Why Trench Drains Get Clogged

Common Reasons Why Trench Drains Get Clogged

By | Drainage Systems | No Comments

The trench drain, also known as a channel drain, is a specialized drainage system that can manage surface water runoff in various situations. Trench drains are normally constructed of fiberglass, polymer concrete, or concrete and laid level with the ground. They resemble narrow troughs or channels.

The main purpose of trench drains is to collect water and divert it away from potential trouble spots such as industrial facilities, parking lots, driveways, and patios. By efficiently diverting water to specific drainage points, trench drains help prevent flooding and erosion, making them especially useful in regions with heavy rainfall.

Trench drains are available in a wide range of designs and sizes to meet the demands of diverse loads and flow rates. They may have covers or grates that let water in while keeping debris out of the drainage canal. Certain trench drains have built-in features that remove impurities, such as oil separators and sediment traps, to improve water quality.

There are several potential causes of clogged trench drains, including:

  • Building debris:

While construction and upgrades are underway, debris like gravel, sand, or cement can clog the trench drain.

  • Freezing and thawing

Water in trench drains has the potential to freeze and clog in winter in regions with lower average temperatures. Thawing may further dislodge debris, thereby exacerbating the problem.

  • Sedimentation

The trench drain’s capacity decreases, and blockages become more likely as time passes and sediment settles into it.

  • Rust and corrosion

Rust and corrosion in the drain system can cause clogs and reduce water flow.

  • Oil and grease

Grease and oil can build up in trench drains in commercial and industrial environments, particularly in garages and parking lots.

  • Litter and garbage

Trench drains are prone to blockage with trash such as wrappers, plastic bags, litter, etc.

  • Poor maintenance:

When people don’t regularly clean and maintain trench drains, obstructions can build up over time.

  • Plant growth

When plants in the area send their roots into trench drains, it can clog them and even damage the drainage system.

  • Insufficient design or installation

Clogs in trench drains can occur due to poor design or installation, such as the wrong size or inadequate slope.

  • Accumulation of debris

Debris collection, including rocks, dirt, leaves, and other items transported by water flow, is a typical cause of blockage.

The importance of unclogging trench drains

Preventing Structural Damage

Damage to pavements, walls, and foundations can occur when standing water seeps into nearby structures due to clogged drains. Unclogging drains is necessary to prolong infrastructure life and avoid water damage.

Maintaining Infrastructure

Regular unclogging of trench drains keeps them in good working order. Regular debris removal could lead to costly replacements or repairs for a clogged drain system.

Compliance with Regulations

To prevent environmental pollution and flooding, many towns have passed legislation mandating that property owners maintain drainage systems, which may include trench drains. Regular unclogging ensures compliance with these rules.

Safety Concerns

Clogged trench drains pose a safety concern, particularly in heavily populated regions. Wet, slippery surfaces increase the likelihood of accidents. Minimizing such threats by keeping drains free promotes safety for pedestrians and drivers.

Prevent Pollution 

Trench drains gather more than rainwater; contaminants, sediment, and debris are common. Unclogging them helps keep these pollutants out of waterways, which is good for ecology and water quality.

Flood Prevention

The drains redirect water away from high-risk locations to prevent flooding. However, clogged drains can cause safety hazards, property damage, and flooding concerns due to water pooling.

The importance of an outlet for a trench drain

The outlet of a trench drain significantly influences its efficiency and functionality. Here’s why it is essential:

Common Reasons Why Trench Drains Get Clogged

  • Aesthetic Considerations

Aesthetically sensitive regions, such as residential landscapes, commercial properties, and public places, are prime locations for trench drain installations. Installing an outlet that drains water effectively without leaving standing water or pools will increase a space’s aesthetic value.

  • Maintaining Safety

Good drainage is crucial for keeping things safe, particularly in places where there are water pools. Properly functioning outlets quickly remove water, reducing the likelihood of slips and falls. Proper drainage also aids in avoiding the accumulation of potentially dangerous materials in industrial environments.

  • Blockage Prevention 

Typically, we install a filter or grate system at the outlet to prevent material from entering the drainage system. This prevents clogs that could cut off water flow. A drain with a clear outlet will last longer between cleanings and require less overall maintenance.

  • Infrastructure Preservation

Without proper drainage, water can gradually erode infrastructure. Excessive dampness can cause soil erosion, foundation weakening, and structural compromise in buildings and pavements. The outlet helps to preserve adjacent infrastructure by providing a clear pathway for water to exit.

  • Water Drainage

A trench drain’s main goal is to efficiently remove water from a specific region. The collected water leaves the drain system via the outlet. If the outlet isn’t working properly, water could pool and cause damage, erosion, or flooding.

Improving aesthetics, safety, clog prevention, and infrastructure preservation is crucial for efficient water drainage. If you want your trench drain system to work properly, you must ensure the outlet is well-designed, installed, and maintained.

Do trench drains need a trap?

Trench drains typically lack the conventional water traps found in standard shower or sink drains due to their large water flow capacity and frequent installation in outdoor or industrial environments, where the containment of unpleasant odors is not a concern. Nevertheless, traps and sediment are not interchangeable; the latter two are ideal in certain trench drains to collect material and avoid blockages. The design and intended use of a trench drain determine the need for a sediment basket or trap.

Does a trench drain need an outlet?

Yes, an outlet is usually necessary for a trench drain to work properly. To avoid floods and water damage, a trench drain collects surface water and reroutes it away from an area. If there were no way to release the collected water, it would only pool inside, rendering this feature useless. When a drain has an outlet, water can leave and go to a storm drain, sewer, or other suitable drainage system.

Conclusion

Unclogging trench drains is essential for preserving water quality, preventing floods, ensuring safety, and maintaining infrastructure integrity. In addition to protecting properties and the environment, regular maintenance and quick unclogging can save time and money in the long run.

How to Dig a Trench for Drainage Pipe in Your Backyard

How to Dig a Trench for Drainage Pipe in Your Backyard

By | Drainage Systems | No Comments

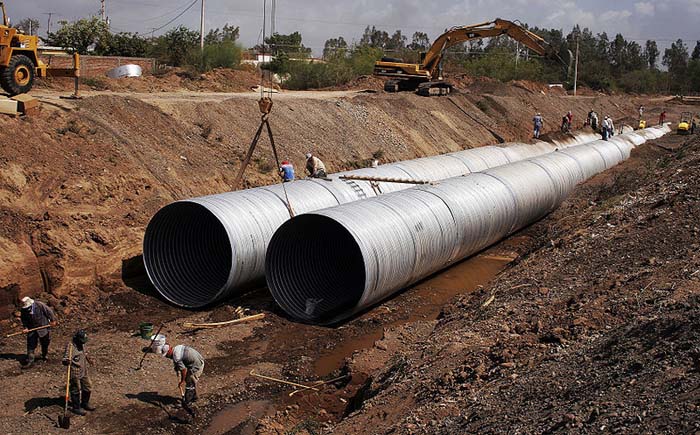
Digging a trench for drainage pipe is a fundamental aspect of many construction projects, particularly in areas where effective water management is crucial. Essentially, it involves excavating a narrow, elongated channel in the ground to accommodate the installation of pipes designed to redirect water away from certain areas, preventing flooding, erosion, and water damage.

The process typically begins with careful planning and surveying to determine the optimal trench route, taking into account factors such as terrain, soil type, and the desired gradient for efficient water flow. Once the route is established, the actual digging begins, often using heavy machinery like excavators or trenchers, although manual digging may be necessary in certain circumstances.

During excavation, it’s important to ensure the trench is dug to the correct depth and width, allowing enough space for the drainage pipes to be laid and properly backfilled without risk of collapse or damage. Additionally, we must pay attention to any existing utilities or structures to prevent interference or damage during the digging process.

After the trench is dug to the required specifications, the drainage pipes are installed and connected according to the project design. Proper alignment and slope are critical to maintaining effective water flow within the system. Once the pipes are in place, backfill the trench with soil, compact it to secure the pipes, and restore the ground surface to its original level.

Here’s how to dig a trench for a drainage pipe in your backyard

Digging a trench for drainage pipe requires careful planning and execution to ensure effective drainage and prevent future issues. Here’s a step-by-step guide:

  • Plan the route

Determine the best route for the drainage pipe. Consider your yard’s slope and the direction of water flow. The trench should follow a downhill slope to ensure proper drainage.

  • Check local regulations

Before digging, check with local authorities or utility companies to ensure underground utilities or cables are not in your trench’s path.

  • Gather materials

You’ll need a shovel or trenching tool, a measuring tape, a level, drainage pipe (usually PVC), gravel or crushed stone, and fittings such as elbows and connectors.

  • Mark the trench

Use marking paint, stakes, and string to mark the trench’s path.

  • Start digging

Begin digging the trench, following your marked path. The trench should be wide enough to accommodate the drainage pipe and allow for proper backfilling. Typically, a width of 6–12 inches and a depth of 18–24 inches is sufficient, but this can vary depending on the drainage needs.

  • Maintain slope:

As you dig, ensure the trench maintains a consistent downhill slope to facilitate water flow. A slope of at least 1/8 inch per foot is recommended.

  • Install pipe

After digging the trench, place the drainage pipe along its bottom. Use fittings as needed to navigate around obstacles or change direction. Ensure the trench and the pipe have the same gradient.

  • Backfill with gravel

After laying the pipe, fill the trench with gravel or crushed stone to provide proper drainage around the pipe. This also helps to prevent soil erosion.

  • Cover with soil

Once the gravel is in place, backfill the trench with soil, packing it down firmly as you go to prevent settling.

  • Test the drainage

After backfilling the trench, test the drainage system by adding water or letting the water flow naturally. Make any necessary adjustments to ensure proper drainage.

  • Secure and protect:

Secure the drainage pipe in place using stakes or straps, as needed. Before backfilling, consider adding a layer of landscape fabric over the trench to prevent soil and debris from clogging the pipe.

  • Finalize

Finally, tidy up the area around the trench and consider landscaping options to integrate the drainage system seamlessly into your backyard.

How deep should drainage pipes be buried?

Local building codes, soil type, climate conditions, and the drainage system’s purpose influence how deep drainage pipes are buried. However, a common guideline recommends burying drainage pipes at least 12 inches (30 centimeters) below the surface to safeguard them against damage from freezing temperatures, vehicle traffic, and other external factors. In colder climates, it may be necessary to bury pipes deeper to prevent freezing. It’s always best to consult local building codes and regulations to ensure proper installation.

How to Dig a Trench for Drainage Pipe in Your BackyardThe minimum slope for a trench drain

The minimum slope required for a trench drain typically depends on several factors, like the drain type, the drain’s intended purpose, and local building codes or regulations. However, a common rule of thumb is maintaining a minimum slope of 0.5% or 1/8 inch per foot (1.0 cm per meter) for effective drainage. This slope helps water and other liquids flow properly toward the outlet or collection point, preventing pooling and facilitating drainage. However, it’s essential to consult relevant standards and guidelines specific to your location and project requirements to determine the minimum slope needed for your trench drain.

Why dig a trench for a drainage pipe in your backyard?

Digging a trench for drainage pipes in your backyard can be essential for several reasons:

  • Minimizing Mosquito Breeding

Stagnant water in your yard can become a breeding ground for mosquitoes, increasing the risk of disease transmission. Effective drainage helps to eliminate standing water, reducing the mosquito population.

  • Preventing Flooding

A well-designed drainage system can prevent flooding by redirecting water away from your property, ensuring excess water doesn’t accumulate in low-lying areas.

  • Preserving Landscaping

Proper drainage helps to maintain the health and beauty of your landscaping by preventing waterlogging, soil erosion, and the spread of diseases that thrive in wet conditions.

  • Protecting Foundations

Excessive moisture around your home’s foundation can lead to structural issues over time. You can divert water away from the foundation by installing drainage pipes, reducing the risk of damage.

  • Preventing Soil Erosion

Water runoff can erode soil, washing away nutrients and destabilizing the landscape. A drainage system helps to control the flow of water, reducing erosion and preserving the integrity of your soil.

  • Water Management

Proper drainage is crucial to managing excess water from rainfall or irrigation. Without it, your yard could become waterlogged, leading to issues like soil erosion, water damage to structures, or the formation of stagnant pools.

Conclusion

Overall, digging a trench for drainage pipe requires careful planning, precise execution, and following regulatory and safety standards. This is to ensure the drainage system’s effectiveness and longevity. Properly installed, these systems are vital in managing water runoff and protecting infrastructure and property from water-related damage.

How to Build the Perfect Concrete Trench Drain

How to Build the Perfect Concrete Trench Drain

By | Drainage Systems | No Comments

A concrete trench drain—also called a channel drain or just a trench drain—effectively collects surface water and channels it away from potentially flood-prone areas. Install a grate or cover on these drains to prevent debris from entering the system. Additionally, the trench is long, narrow, and lined with durable concrete.

The efficient management of stormwater runoff is one of the main purposes of a concrete trench drain in a variety of environments, such as municipal, commercial, residential, and industrial areas. Loading docks, parking lots, driveways, and sidewalks are ideal for their installation outdoors, where water tends to pool.

A concrete trench drain can properly collect and divert water from the ground. This helps to protect infrastructure from water damage, erosion, and puddles. Another way they contribute to better safety is by decreasing the likelihood of slip-and-fall incidents brought on by pools of water.

Because it adapts to a wide range of configurations, shapes, and sizes, a concrete trench drain is a great choice for various drainage applications. During installation, we dig a trench, place and secure the concrete channel, and backfill with concrete or aggregate to ensure stability.

What is a trench drain system?

A trench drain system—also called a channel drain—is a typical option when surface water needs to be properly captured and moved away from industrial facilities, driveways, parking lots, and patios.

A trench drain system features a long, narrow trench or channel, usually constructed of metal, plastic, or concrete. Installed level with the surface, this channel slopes slightly to promote water flow toward a specified collecting point or outlet.

The trench has a slotted cover or grate that lets water in but keeps larger material out. Once it enters the trench, the channel directs the water to an appropriate drainage area, stormwater management system, or drainage pipe.

Trench drain systems have many benefits, including protecting infrastructure from water damage and regulating surface water runoff. You can change their size, material, and arrangement to meet your applications and load requirements.

Steps on how to make a concrete trench drain

Several procedures come into play when creating a trench drain out of concrete. Here’s an overview:

Design and Planning

  • Find out what size and kind of grate or cover you’ll need for the trench drain to keep large objects and debris out.
  • Determine the required dimensions by plugging in the anticipated water volume and flow rate.
  • When deciding on the trench drain’s length, width, and depth, consider the expected water flow and the site’s specifics.
  • Make sure water drains properly towards the trench by considering the angle of the land.
  • Find out where you’ll use the trench drain and its function. Does it include wastewater management, industrial runoff, or stormwater drainage?

Gather tools and materials

  • You will need common construction equipment such as a shovel, a level, a wheelbarrow, and, if necessary, a concrete mixer (for large-scale concrete projects).
  • For extra strength, you may need reinforcement bars (rebar). But this depends on the size and load-bearing requirements.
  • Concrete mix: Choose a premium concrete mix appropriate for your project.

Excavation

  • To stabilize the soil at the base of the trench, compact it.
  • Excavate the trench according to your intended proportions. Ensure the trench’s base slopes slightly toward the intended outlet for proper water drainage.

Base Installation and Reinforcement:

  • If necessary, reinforce the concrete by placing the rebar framework inside the trench. All load-bearing requirements must be considered when deciding on rebar size and spacing.
  • Spread crushed stone or gravel at the trench’s base for correct drainage.

Formwork Setup

  • Build forms along the trench’s sides to define the drain’s shape. Check that the forms are sturdy and not crooked.
  • If needed, fasten the forms in position using stakes.

Mixing and pouring concrete

  • Ensure you prepare the right amount of concrete by following the instructions on the package.
  • Working your way to the other end of the trench, pour the concrete into the space between the formwork.
  • Using a trowel or shovel, evenly distribute and level the concrete along the trench.

Finishing

  • Use a float or screed to smooth out the concrete’s surface for a consistent look.
  • Get the concrete halfway hardened before taking the forms out. This will prevent the concrete from deforming or slumping.
  • Carefully remove the forms when the concrete hardens to the desired consistency.

Curing and sealing:

  • To keep the surface protected and make it last longer, consider sealing it after the concrete cures fully.
  • Keep the trench wet for a few days to ensure the concrete cures properly. You can spray it with water regularly or cover it with plastic sheets.

Testing and Maintenance:

  • After installing the trench drain, make sure it works properly by filling it with water and watching it drain.
  • Over time, routine maintenance, such as clearing the debris drain, will keep it in good working order.

Remember that the concrete trench drain must conform to all applicable municipal, state, and federal safety and structural standards. If you’re not good with concrete, consider getting a pro to help you.

How to Build the Perfect Concrete Trench DrainHow deep can a trench drain be?

A trench drain’s depth can change based on the construction materials used, local construction codes, and intended use, among other things. Trench depths typically vary from a few inches to several feet.

The depth of a concrete trench drain for domestic use, like a patio or driveway, is usually between four and six inches. In commercial or industrial situations, trench drains can be deeper—up to two or three feet—to manage higher loads or bigger volumes of water.

To find out what depth is necessary for your project, it’s best to talk to an expert engineer or builder and research local building codes. When deciding how deep a concrete trench drain should be, it’s important to take into account things like water flow rates, slope, and soil composition.

The pros and cons of trench drains

Pros

There are numerous benefits to using a concrete trench drain:

  • Durability

Trench drains are long-lasting and reliable because they withstand harsh weather and large loads. Durable materials used to make them include stainless steel, fiberglass, and polymer concrete.

  • Visual Appeal

While mainly functional, a trench drain improves an area’s aesthetic appeal and can also add to its aesthetic value. They are available in a variety of finishes and styles to match any decor.

  • Versatility

Their versatility makes them ideal for use on various surfaces, from pavers and asphalt to concrete. Additionally, their ease of installation makes them suitable for indoor and outdoor settings.

  • Safety

They improve security by reducing the risk of falling due to stagnant water.

  • Customizable

You may customize a concrete trench drain to fit your individual preferences. This is because they come in a variety of materials and sizes. You can customize them with various grating options to suit specific load-bearing needs or personal aesthetic preferences.

  • Easy to Maintain

Easy maintenance is a hallmark of concrete trench drain design. Grates are usually detachable, making debris removal and cleaning a breeze.

  • Effective water drainage

Trench drains are a great way to collect and redirect water away from commercial areas, patios, and driveways vulnerable to pooling and flooding. This helps prevent water damage and ensures safety.

  • Prevent Erosion

A concrete trench drain can help keep structures and surfaces intact over time by diverting water away from areas that could erode.

Cons

While trench drains are a great option for many different types of drainage problems, they are not without their flaws:

  • Easy Access

Some people, especially those with mobility concerns, may find trench drains inaccessible. This can be an issue in places that need to adhere to accessibility standards, such as public venues.

  • Freezing in Cold Environments

Trench drains can freeze in colder climates when winter rolls around. This can hinder their functionality and necessitate extra precautions to prevent damage.

  • Maintenance

Trench drains in areas where debris accumulates require frequent cleaning and maintenance to prevent clogging. Ignoring maintenance might result in flooding, bad smells, and other problems.

  • Limited Capacity

A concrete trench drain’s ability to manage significant amounts of water during floods or severe rainfall depends on its size and construction. This may lead to drainage and overflow problems.

  • Installation Intricacy

Expertise and meticulous preparation are necessary to install a concrete trench drain correctly. Inadequate drainage capacity or water pooling are drainage issues that might result from improper installation.

  • Visual Appeal

In residential or commercial areas where aesthetics matter, trench drains may appear unattractive, despite their practicality.

  • Potential for Damage

Trench drains can be damaged when subjected to large loads, such as when vehicles drive over them. Heavy machinery or regions with high traffic volumes are specific causes for concern.

  • Sediment Accumulation

A concrete trench drain can become less effective and even clog up with the gradual accumulation of debris and sediment. Preventing this issue requires regular maintenance.

  • Cost

Installing a concrete trench drain can be expensive, particularly if extensive digging is required. Customization and specialized materials might drive up the cost even more.

Despite these limitations, trench drains’ versatility and efficiency make them a popular alternative for managing surface water in numerous applications.

How much does a trench drain cost?

Installation difficulty, dimensions (depth, width, and length), material, and extra features (such as channels or grates) all play a role in the final price tag for a concrete trench drain. A simple trench drain system, not including installation fees, may cost anything from $20 to $100 per linear foot. It would be wise to seek quotes from contractors and suppliers who can address your unique requirements and needs for a more precise idea of the costs involved.

Conclusion

After digging a hole, positioning the drain channel, checking the drainage slope, backfilling, and securing the drain, you can install a concrete trench drain. If you want the drainage system to last for years and work perfectly, you must regularly clean the grates and drain channels.

Is a Swale Better Than a French Drain?

Is a Swale Better Than a French Drain?

By | Drainage Systems | No Comments

It is important to consider the situation and the goals you wish to accomplish when determining whether a French drain or a swale will be more effective in addressing your drainage concerns. Both can control the flow of water, but it is important to note that they function differently and are best suited to various circumstances.

Is a swale better than a French drain?

Swale

A swale is a wide, shallow canal that can direct runoff to a specific area or let it soak into the ground. Natural or man-made swales typically have vegetation to reduce water flow, increase infiltration, and filter out contaminants.

Pros of a Swale

Landscapers create swales to control water flow, increase infiltration capacity, and sometimes even provide a place for plants to thrive. Swales have many benefits for stormwater and landscape management, including the following:

  • Improvement of Water Quality

Water that passes over a swale can remove contaminants and sediments. This natural filtration process enhances the water quality that makes it into groundwater or other bodies of water downstream.

  • Design Flexibility

You can customize swales in terms of vegetation, shape, and size. This allows you to include them in various landscape designs and fulfill certain requirements.

  • Groundwater Recharge and Water Infiltration

Water infiltration into the earth via swales can reduce surface runoff, support plant life, and replenish aquifers.

  • Cost-Effectiveness

Swales are a simple and inexpensive way to control stormwater instead of using expensive and complicated systems like detention ponds or underground pipes. They usually necessitate less infrastructure and maintenance.

  • Stormwater Management

Swales’ natural function is to collect and filter runoff. In doing so, they reduce the load on stormwater drainage systems and, consequently, the likelihood of flooding.

  • Preventing Floods

Swales can control and channel runoff, reducing the likelihood of flooding in surrounding areas in the event of a heavy rainstorm.

  • Erosion Control

Swales help decrease soil erosion by regulating water flow to specified regions and slowing it down. This prevents uncontrolled runoff, which can degrade land surfaces.

Cons of a Swale

The following are a few typical swale problems or drawbacks:

  • Limited Utility for Urban Settings

Swales may be useless in densely populated areas due to underground infrastructure, high-density buildings, or other space limitations.

  • Drainage and Waterlogging Problems

Due to poorly constructed swales, waterlogging can result in saturated soils and possibly damage adjacent vegetation or structures.

  • Cost and Labor-Intensive

Building a swale can raise material, grading, and digging costs because of the work and machinery needed.

  • Inconsistent Performance

Swales can manage a certain amount of water. However, they may not be enough to stop flooding in severe weather or erosion and may need to be repaired.

  • Maintenance

Swales require routine maintenance to remain in good working order. This process includes dealing with erosion within the swale, controlling vegetation, and cleaning debris.

  • Danger of Erosion

Poor swales construction or maintenance can lead to erosion, which can reduce their effectiveness and cause sedimentation in other areas.

  • Space Requirements

Because of their expansive nature, swales may not be practical in places with little available land or densely populated regions.

French Drain

This is one way to divert surface or groundwater. It features a trench with a perforated pipe filled with rock or gravel. The drain redirects water away from buildings or into a drainage system.

Is a Swale Better Than a French Drain?

Pros of a French Drain:

  • Advantages for the Environment

French drains can reduce water runoff into municipal sewer systems, alleviate pressure on public infrastructure, and decrease the likelihood of sewage overflows. In certain regions, they can also aid in recharging groundwater, which is a great way to help the environment.

  • Low Maintenance

French drains often only need a little maintenance after installation. In most cases, all that’s required to keep things running well is a periodic cleaning of debris and a thorough inspection.

  • Water Damage Prevention

French drains direct water away from buildings, reducing the likelihood of structural problems, decreasing the risk of mold, and preventing water damage to foundations, basements, and mildew.

  • Cost-Effective

Installing a French drain, particularly in a straightforward gravel-filled trench without further plumbing, is comparatively less expensive than other drainage systems.

  • Prevention of Erosion 

In regions where runoff from excess water is a problem, French drains can prevent soil erosion by directing the water into a controlled channel.

  • Versatility

French drains are adaptable, and you can customize them to meet the unique draining requirements of any residential or commercial property.

  • Aesthetically Unnoticeable

French drains, typically covered with gravel or buried below, are less noticeable than other drainage systems. As a result, the landscape is less cluttered and more visually pleasing.

  • Preserving Landscapes

French drains control water flow and are a great way to protect gardens, lawns, and other landscaping features from floods and standing water.

  • Long Lifespan

French drains can last decades and continue to drain water efficiently when properly installed.

  • Water Diversion 

If you have a low-lying area, basement, or foundation prone to flooding, a French drain can help direct surface and groundwater away from low-lying places.

Cons of a French Drain:

  • Effects on the Environment 

The installation process can affect the local ecology, especially if digging holes damages the roots of nearby shrubs and trees or interferes with existing drainage patterns.

  • Aesthetic Considerations

French drains are typically trenches coated in gravel, which may not be to everyone’s taste in landscaping. This may be an issue for individuals who value beauty above all else.

  • Landscape Disruption

Trenching for a French drain may disturb trees, gardens, lawns, and other landscaping elements. Repairs might take a long time and a lot of money.

  • Erosion is a Possibility

Soil erosion, especially at discharge, can result from poorly planned French drains.

  • Maintenance Requirements

In order to keep French drains working properly, maintenance is necessary on a regular basis. Roots, sediment, or debris obstruction can lead to reduced efficiency.

  • Limited Longevity

French drains’ longevity depends on the materials and the surrounding environment. Processes like root filtration, sedimentation, and erosion can reduce their efficiency over time.

  • Needs the Right Outlet

A proper outlet is necessary for the water to exit a French drain. Directing the water to the right place can reduce its effectiveness.

  • Clogging Possibility

If not properly maintained, clogged French drains can cause a water backlog or drainage failure. However, this is avoidable with regular cleaning and inspection.

  • Installation Costs

The cost of installing a French drain may add up quickly. This includes materials like pipe and gravel, labor, and any necessary digging or landscaping tasks.

Choosing between a Swale and a French Drain

  • If you’d like to delay the flow of water or add landscaping to some areas,

It might be better to use a swale.

  • Places that receive a lot of rain or have high water tables:

Using a French drain may yield better results.

  • When managing drainage in a small space, particularly in proximity to buildings,

It may be better to use a French drain.

  •  For those looking for a sustainable option and a sizable plot of land:

A swale could be the way to go.

Conclusion 

Ultimately, it all comes down to your property’s unique requirements, the weather where you live, the soil type, and the available space. To get the most out of it, get expert advice from drainage specialists, civil engineers, or landscape architects.

How Do Drainage Grates Work?

How Do Drainage Grates Work?

By | Drainage Systems | No Comments

Drainage grates are crucial parts of many building and infrastructure projects. They help control the flow of water and avoid flooding in many different locations, from homes to factories. They protect drainage channels from leaves, debris, and other big objects while letting water pass through.

All you need to know about drainage grates

In order to ensure the safe and long-lasting drainage of water, drainage grates—sometimes called drain covers—are an integral component of city infrastructure. A thorough explanation of drainage grates is provided here:

What are drainage grates?

Typically utilized for stormwater management, drainage grates are covers made of plastic or metal that have holes, slits, or other openings that permit water to flow through them and into a drainage system. They can be found in industrial facilities, parking lots, streets, and driveways.

Types of Drainage Grates

Depending on their location and application, drainage grates are available in various types:

  • Custom Grates

Grate styles vary to meet the demands of different types of landscaping and architecture.

  • Manhole Covers

Drainage and utility systems located below ground are easily accessible through circular grates.

  • Catch Basin Grates

They cover larger basins that collect water in parking areas and streets.

  • Floor Drains

Common indoor applications include industrial facilities, basements, and garages.

  • Trench Grates

These long, narrow drainage trenches are common in parking lots and streets.

How do drainage grates work?

Many drainage systems would only be complete with drainage grates, which act as covers and channels for water. They find widespread application in various residential and industrial environments, parking lots, urban areas, sidewalks, and roads. A brief explanation of the function of drainage grates is as follows:

How Do Drainage Grates Work

  1. Function:
  • Prevent Debris Blockage

Grates cover drainage systems’ openings to keep large pieces of litter, debris, and other solids out. This prevents clogging of underlying channels or pipes.

  • Allow Water Flow:

Grates allow water to flow through them and into the drainage system, preventing debris. This is critical for managing stormwater and avoiding floods during storms.

  1. Design and Structure:
  • Shape and size

Grates are available in a wide range of shapes and sizes. These include custom shapes to suit individual needs, as well as custom, round, and rectangular options to accommodate common drainage systems.

  • Openings and Patterns

They are available in various patterns and designs to balance strength and water flow, including lattice, mesh, and bars. Carefully designed openings ensure efficient drainage and prevent large debris from entering.

  • Materials

Typically, grate construction involves durable materials like plastic, steel, cast iron, or aluminum. The exact composition may vary depending on the specific use and surrounding conditions.

  1. Types of drainage grates:
  • Channel Grates

Residential areas commonly feature linear drainage channels. They efficiently drain water while still looking nice.

  • Catch Basin Grates

These grates cover the catch basins that collect and redirect stormwater, typically located at intersections or street corners.

  • Trench Grates

Trench grates are a common way to collect surface water in urban, industrial, and parking lots.

  • Street and Road Grates

They channel runoff from roadways and highways into designated storm drains. They can endure the weight of traffic.

  1. Installation and Maintenance:
  • Installation

Make sure the grates fit securely to avoid damage or shifting. Usually, frames hold them in place.

  • Maintenance

Regularly check the grates to ensure dirt, leaves, or other debris haven’t clogged. This prevents water from backing up, pooling, and possibly flooding.

  1. Safety Considerations:
  • Durability and strength

Grates may need reinforcement to withstand the weight of vehicles and other environmental stresses, depending on their location. This will ensure no one can enter the drainage system without permission.

  • Resistance to Slippage

It is common practice to make grates resistant to slips for both vehicles and pedestrians.

Materials Used in Drainage Grates

Drainage grates can be made of various materials, each with pros and cons in terms of application, expense, and durability.

  • Polymer or Plastic 

It is suitable for light-duty applications due to its lightweight and corrosion-resistant construction.

  • Steel

Galvanization frequently protects it from rust, making it strong and long-lasting.

  • Cast Iron

They are strong and long-lasting, frequently utilized for outdoor purposes.

  • Aluminum

It is more sturdy than steel or cast iron but also lightweight and corrosion-proof.

Design Considerations

When designing or selecting a drainage grate, consider several factors:

  • Water Flow

To prevent flooding, the design ought to incorporate adequate water drainage.

  • Aesthetics

It may be necessary for the design to harmonize with the existing landscape or architecture in certain contexts.

  • Resistance to Slippage 

It is critical for pedestrians’ well-being, especially when it rains.

  • Load Capacity

Vehicles and pedestrians’ weights should be manageable for the grate to bear.

  • Security

Protecting grates in public areas from theft or unwanted entry is paramount.

Applications of Drainage Grates

Drainage grates are useful for many things, including:

  • Landscaping

The goal is to control the flow of water in parks and gardens.

  • Residential and Commercial Properties

This product is perfect for basements, parking lots, and driveways.

  • Industrial Facilities

It serves as a means of water drainage in commercial buildings like warehouses and factories.

  • Urban Drainage Systems

The goal is to control the runoff collected in streets and other public spaces.

Safety and Maintenance

In order to keep drainage grates in good working order and prevent accidents, proper maintenance is necessary.

  • Safety Measures

To avoid theft or accidents, make sure you fasten the drainage grates.

  • Inspection

The process involves inspecting for wear, corrosion, or damage and replacing them when necessary.

  • Cleaning

To keep clogs at bay, it is necessary to remove dirt and debris routinely.

How do you remove a channel drain grate?

It usually takes a few tools and caution to remove the grate from a channel drain without damaging it. Here’s an overview:

Equipment and tools

  • Safety Goggles

This is so you can keep dust and other particles out of your eyes.

  • Gloves

That way, you will only cut your hands on something sharp.

  • Crowbar or Pry Bar

Softly pry the grate open.

  • Pliers

When pieces become stuck, you need to free them.

  • Allen keys or screwdrivers

To loosen the grate’s fasteners, use this tool.

Step-by-Step Guide

Examining the Grate

Check the grate for any fasteners, such as bolts or screws, that may be keeping it in place. To choose the correct tool, you must first identify the type of fastener.

Remove the fasteners

  • Use an Allen key, screwdriver, or other suitable tool to remove any bolts or screws. Reserve them for later assembly in a secure location.

Use a Pry Bar

  • If it isn’t screwed down but fits snugly, you can gently lift it with a pry bar or something similar. Carefully insert the pry bar into a grate’s edge or slot and press down to lift it.

Lift the Grate

  • After loosening the grate, carefully raise it. Because of its weight and size, assistance may be required. To avoid back pain, use your legs to lift anything heavy.

Inspect and Clean

  • After you remove the drainage grates, look for damage or debris in the channel. Remove debris, such as leaves or dirt, before putting the grate back together.

Reinstall the Grate

  • Make sure you properly align the grate with the channel before replacing it. Return any fasteners, such as bolts or screws, to their original positions.

How Do Drainage Grates Work?

Tips 

  • Prioritizing safety

Before beginning any task, make sure there is enough light and the area is safe.

  • Always wear gloves

Wearing gloves is important when handling grates, as there is a potential for metal splinters or sharp edges.

  • Be cautious of rust.

Be careful not to use too much force if the grate is stuck or rusted. To remove rusted fasteners, use penetrating oil.

Removing and replacing a channel drain grate should be safe if you follow these steps.

Why are sewer grates so heavy?

There are a number of significant reasons why sewer grates are heavy:

Stability Against Water Flow

  • Because the sewer grate absorbs a lot of water, its weight helps it remain in place during flooding or severe rain. Because of this, storms and other high-flow situations won’t be able to lift and wash away the grate.

Tamper and Theft Prevention

  • Thieves and vandals are less likely to target sewer grates because of their heavy construction. The weight of heavy metal objects like grates deters theft.

Durability and longevity

  • Usually constructed of strong materials like steel or cast iron, heavy sewer grates can bear much stress and weight from buses, trucks, and cars. The weight adds to the grate’s durability and life.

Heavy Load Support

  • Vehicles, particularly those traveling on heavily used roads, can put a lot of pressure on sewer grates. The grate is strong enough to withstand these loads and has the right material.

Security and safety

  • Sewer grates are typically well-anchored because their weight makes them difficult to move. This impacts the well-being of both pedestrians and vehicles. Removing or moving a grate could create a potentially dangerous gap in the street.

In the grand scheme of things, the heaviness of sewer grates is vital for city infrastructure’s longevity, safety, and security.

Conclusion

Grates for drainage play an important role in today’s infrastructure. They allow for safe and efficient water management in various settings. With careful consideration of design, material, and type, drainage grates keep spaces safe and functional while reducing the likelihood of accidents and water damage.

Steps to Help Keep Dirt Out of a Channel Drain

Steps to Help Keep Dirt Out of a Channel Drain

By | Drainage Systems | No Comments

Channel, trench, or linear drains are drainage systems that collect and remove surface water from industrial areas, parking lots, driveways, pools, and patios. To collect water more efficiently and send it to a designated discharge point, a channel drain uses long, narrow troughs that can span a larger surface area than conventional point drains.

Important characteristics of a channel drain consist of:

  • Installation and Maintenance

Dig a trench, set the drain in place, and then attach it to an existing outlet or drainage system. That is how you install a channel drain. Cleaning the grates and keeping the drainage system free of dirt are common maintenance tasks.

  • Material and durability

The channel’s construction can utilize stainless steel, polymer concrete, plastic, or fiberglass materials. The choice of material depends on the desired resistance to weather or chemicals, durability, and strength.

  • Grated/Cover

A channel drain’s grated lid lets water in but keeps junk out. The grates are available in a variety of forms and materials to complement the aesthetic of the installation site. Some examples of these materials are concrete, metal, or plastic.

  • Linear Design

The straight-line shape of a channel drain allows it to collect surface water from a wider area. Their linear design allows placement across open areas, walkways, or driveways to collect water.

Channel drains are used in the residential, commercial, and industrial sectors. They are ubiquitous in areas where effective drainage is vital, such as industrial facilities, pool decks, parking lots, sports fields, sidewalks, and driveways.

Here are some steps to help keep dirt out of a channel drain

When controlling water runoff and keeping places like patios, driveways, and areas surrounding pools from flooding, a channel drain is an essential component. Keeping debris and dirt out of a channel drain ensures optimal performance and reduces the likelihood of blockages. To ensure that a channel drain stays clean, follow these steps:

Cover or grate installation

  • Cover the channel drain with a grate, either made of plastic or metal. This is the first line of defense and crucial for safeguarding against larger debris like twigs and leaves. Installing the grate in a walkway or driveway requires careful consideration. This ensures that it has small enough gaps to block larger particles while sturdy enough to resist traffic.

Use a filter fabric or leaf guard

  • You might want to use filter fabric or a leaf guard underneath to keep tiny particles from getting through the grate. If there are a lot of leaves or other organic materials around, this might be quite helpful. Make sure you can easily remove and clean the guard or fabric.

Cleaning the drain regularly

  • To remove any built-up debris, make sure to clear the channel drain on a regular basis. To clean the channel thoroughly, use a power washer or a firm brush to eliminate debris. Ideally, it would help if you cleared the drain once a month, and more often during seasons when a lot of leaves are falling.

Maintain surrounding areas

  • Ensure no debris, leaves, or dirt buildup around the channel drain. This method can reduce the amount of debris that goes down the drain. Regular sweeping or blowing is necessary to maintain the cleanliness of patios, driveways, and other outdoor surfaces.

Don’t throw debris or dirt near the drain 

  • When watering plants or during rainstorms, it is not a good idea to put landscaping materials near the drain, such as mulch or dirt, as dirt might wash into the channel.

Ensure proper drainage

  • Check that the channel drain has the proper slant for optimal water flow when water pools in drains, sediment and other debris can accumulate. Proper drainage aids in maintaining a clear waterway.

Educate others

  • If the channel drain is in a public location or somewhere else where others might be able to obtain it, make sure people know not to throw leaves, waste, or other garbage down the drain. This can prevent unintentional damage or blockages.

Deal with erosion problems

  • Act quickly to fix the problem of soil erosion or excessive dirt buildup near the drain. To reduce the likelihood of erosion and the subsequent debris washing into drains, you might implement landscaping techniques like the right ground cover or retaining walls.

The impact of dirt on a channel drain is significant.

Many problems might arise from a filthy channel drain in any building, whether a home, business, or factory. Here’s a rundown of the most important ones:

  • Regulatory and Legal Risks

If a region’s drainage system isn’t well-maintained and causes environmental damage or flooding, it could face legal consequences. Local legislation may require proper maintenance to avoid fines or penalties.

  • Water Damage

Overflowing water from clogged drains can damage nearby landscaping, structures, and even interior areas if the water becomes trapped within. Damage like this can require expensive maintenance and repairs.

Steps to Help Keep Dirt Out of a Channel Drain

  • A Decreased Drainage System’s Lifespan

Debris accumulation and persistent obstructions hasten the deterioration of drainage components, making them obsolete and necessitating costly repairs or replacement.

  • Health Hazards

A clogged drain leaves standing water that could attract pests like mosquitoes and other disease-carrying insects. More importantly, organic debris in the drain can promote the development of mold and bacteria, which can cause health problems.

  • Environmental Impact

Pollutants from unclean drains can enter nearby waterways, harming aquatic life and lowering water quality. Polluted runoff might be a big problem for the environment.

  • Increased Maintenance Costs

If not cleaned regularly, dirty channel drains can increase maintenance expenses. You might have to pay for expensive drain repairs or professional cleaning services to get things working again.

  • Structural Risks

Clogged drains or overflows can cause soil erosion or weaken structural elements, putting buildings or other infrastructure at risk of collapse.

  • Negative Aesthetics:

Unclean drains can damage a place’s aesthetic value. This is especially troublesome for commercial facilities and enterprises that value cleanliness and aesthetics.

  •  Blockages and Clogging

Clogged or partially blocked pipes can reduce or halt water flow. This is due to the accumulation of leaves, debris, dirt, and other things. This could result in flooding or water pooling during rainstorms or periods of high water demand.

  • Nasty Smells

The buildup of stagnant water and organic waste can produce odors that permeate neighboring areas. When people are often present, such as in a home or business, this can be an especially big deal.

Regularly checking and maintaining channel drains is critical for preventing these problems. This entails removing soil, sediment, and debris from the area and fixing any structural issues that may have occurred due to erosion or other causes. You can decrease the quantity of debris or dirt in the system by placing screens or grates over the drain.

Conclusion

A channel drain is an excellent option for controlling surface water and avoiding pooling and flooding. Due to their adaptability in both design and location, channel drains find widespread use. Following these guidelines can reduce the risk of clogs and other drainage problems by keeping dirt and debris out of your channel drain, which will help it run smoothly.